
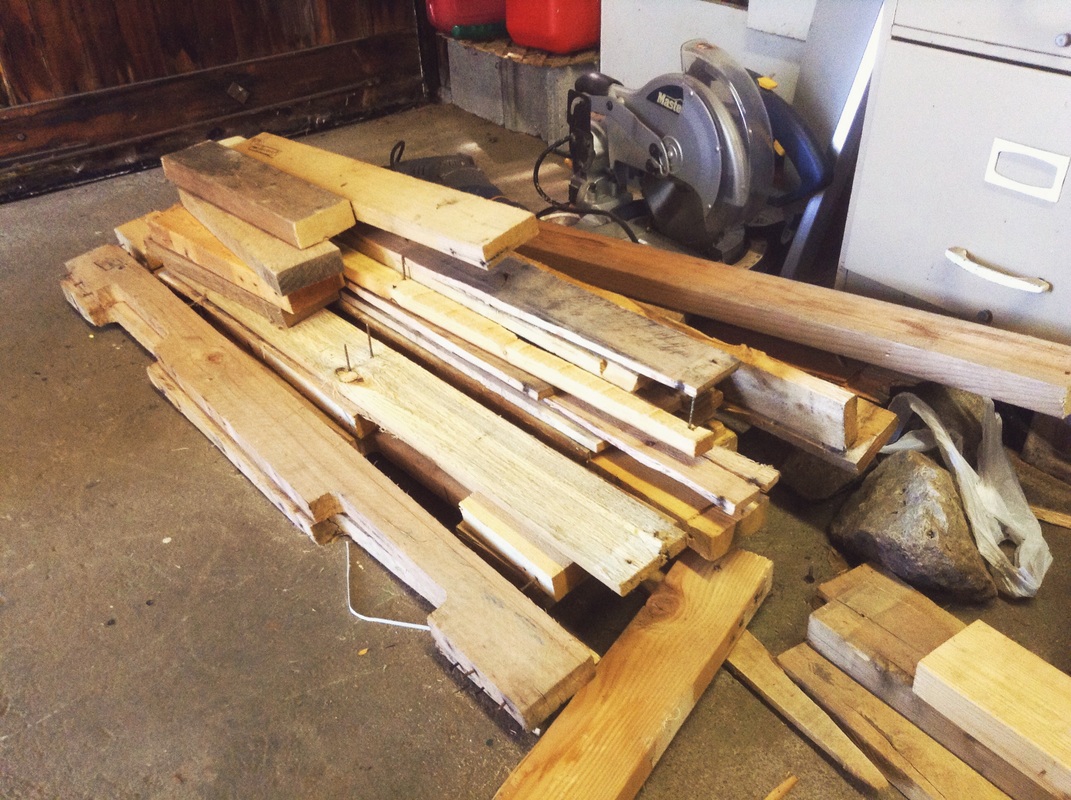
A potting bench is a more achievable undertaking, and - you know me - I figured I could make one for almost free.
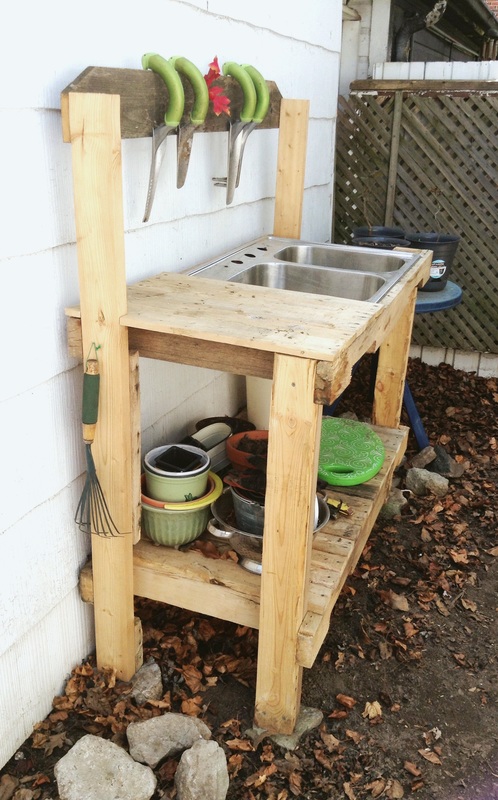
My first step was to decide what features I wanted in my potting bench. I needed ample storage for the loose plant pots that normally litter our patio and garage from spring to fall as I plant, transplant and experiment. I wanted some storage for the small tools I use all the time. And I wanted my bench to have a stainless steel sink so I could muck around with plants and dirt and water without having to worry about being messy. A sink would also be a good place to keep plants wet while they wait to be planted or transplanted.
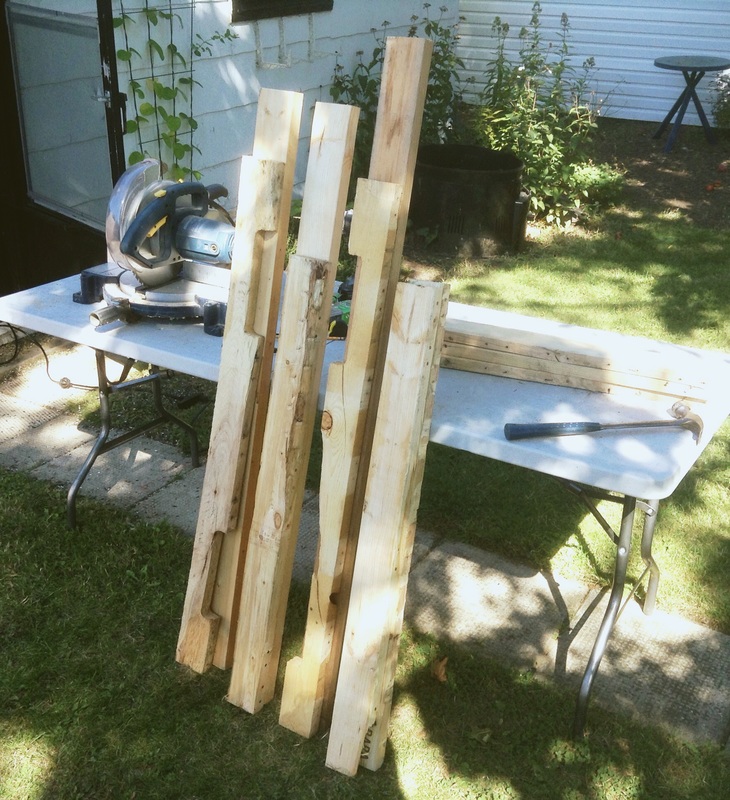
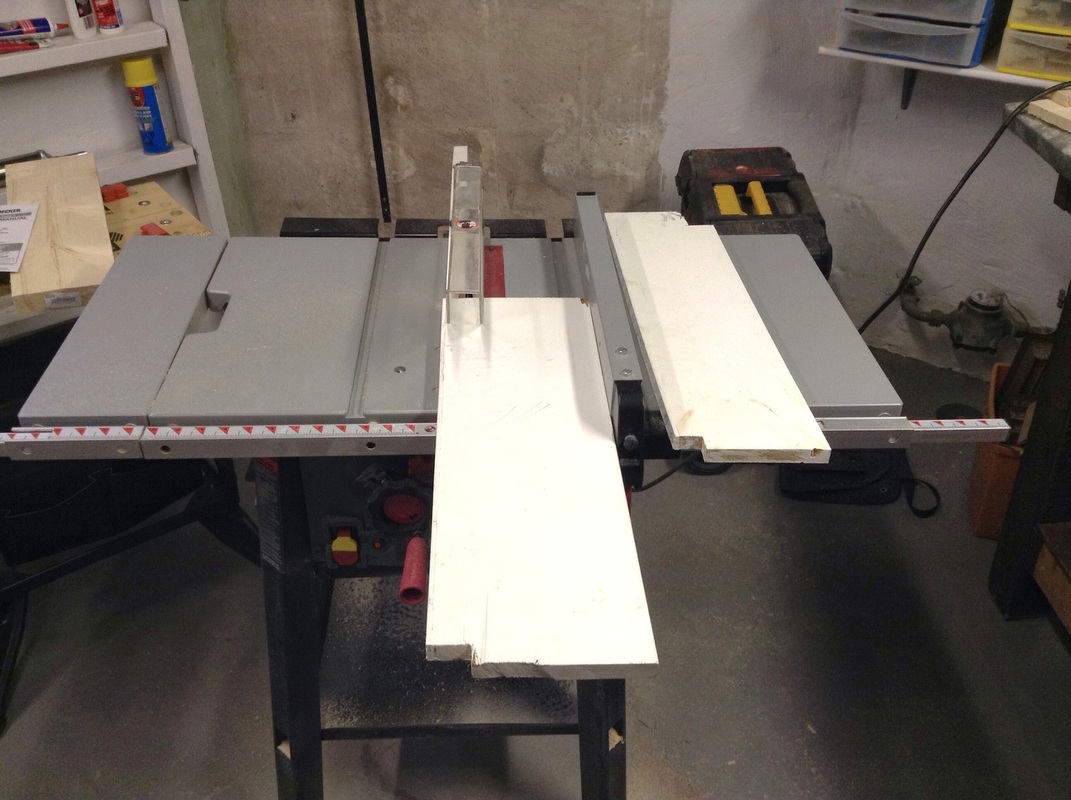
I picked all the sturdiest pieces for the frame, and chose thinner planks for bench's shelf and counter. As you can see, the pieces are far from perfect, and many pieces have curved gouges meant for forklifts when they carry loads of pallets. But I was quite happy to have a rugged, beaten-up, rustic potting bench. (And as Dan pointed out to me recently, my potting bench has a convenient feature in that it can always be lifted by a forklift if necessary!)
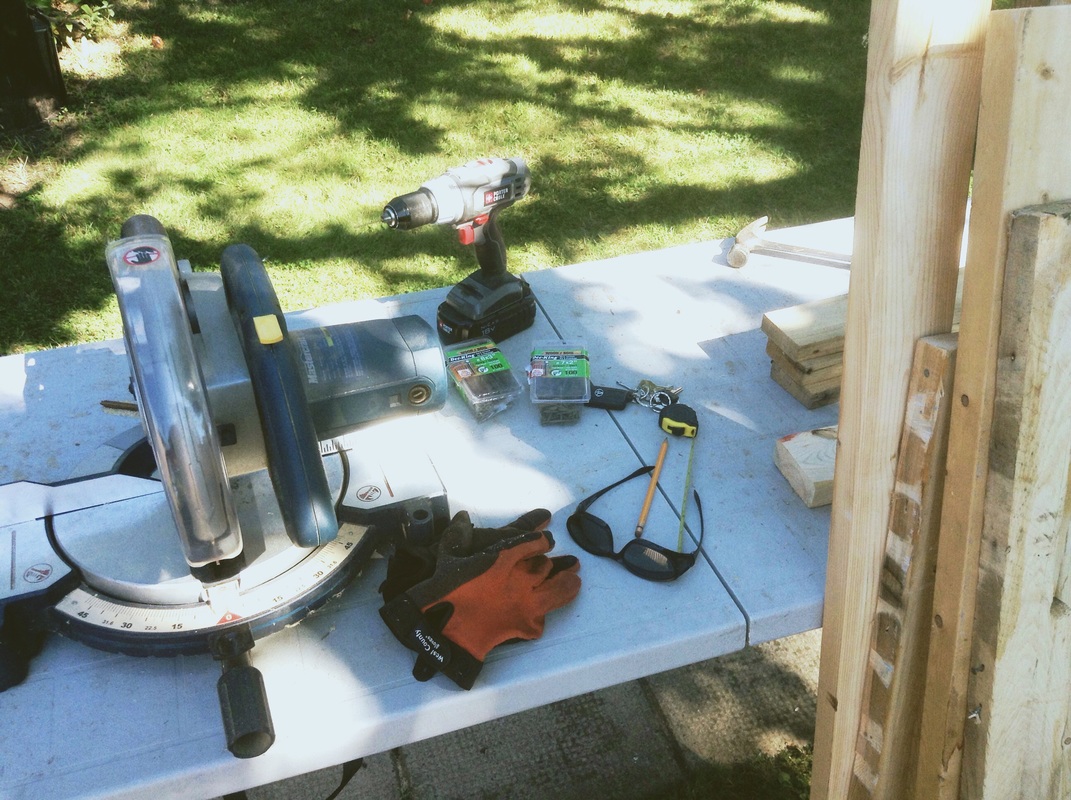
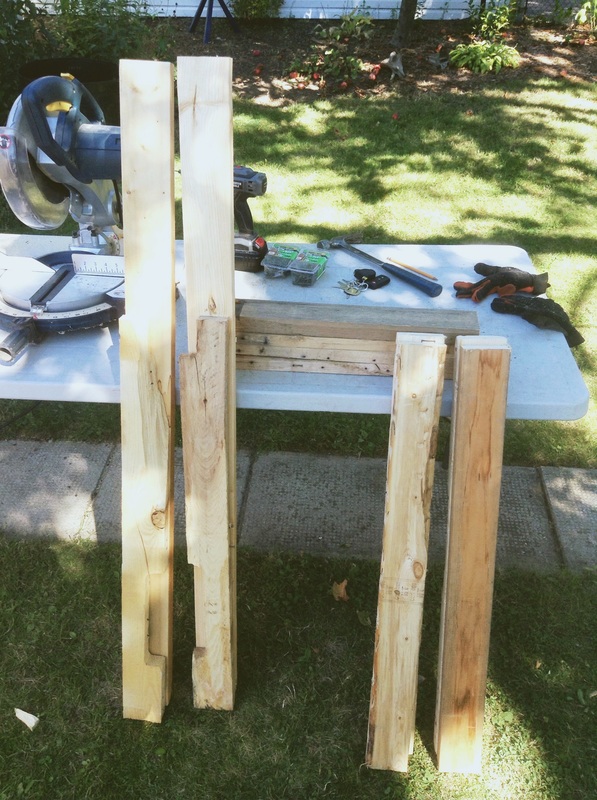
Next, I made sure I had all my tools and implements ready to go. Here's what I used for my bench:
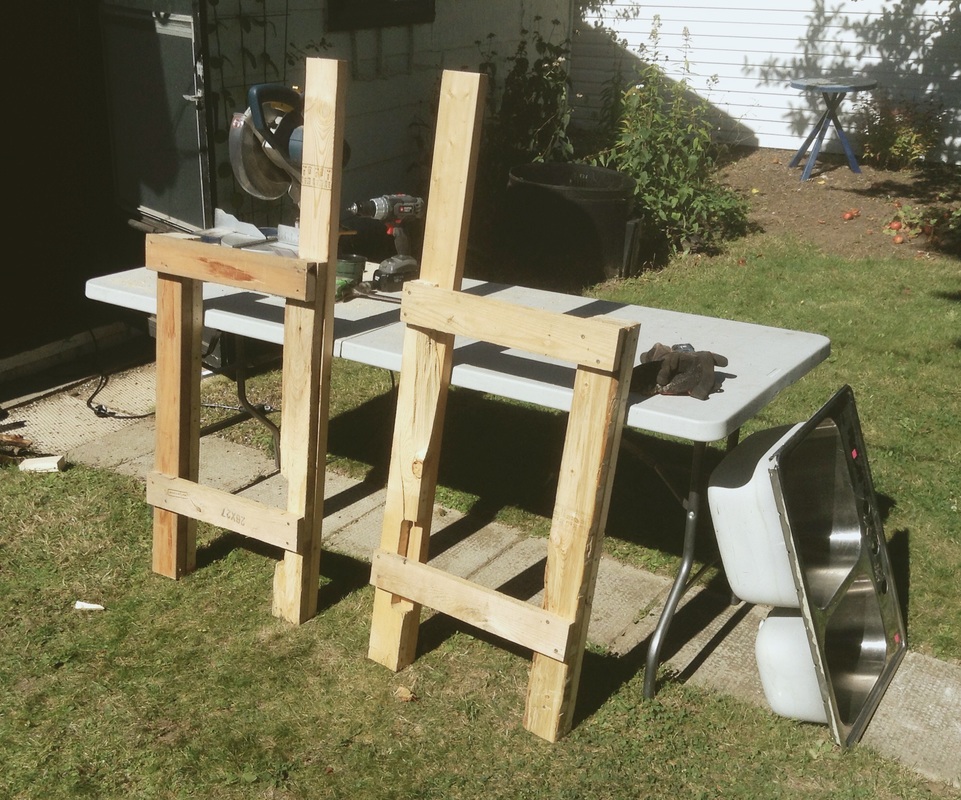
When I build stuff, I like to start by cutting to size all the pieces I need, as much as possible. This keeps things more organized in my brain and in my work area (the backyard in this case). With this potting bench, my starting point was to build two side frames, and then attach the frames together with four lengths of wood. I planned for my bench to be 36" high, which is standard counter height. Here are all my side frame pieces, cut and ready to go!
 Opa (Willem) Koopman Opa (Willem) Koopman
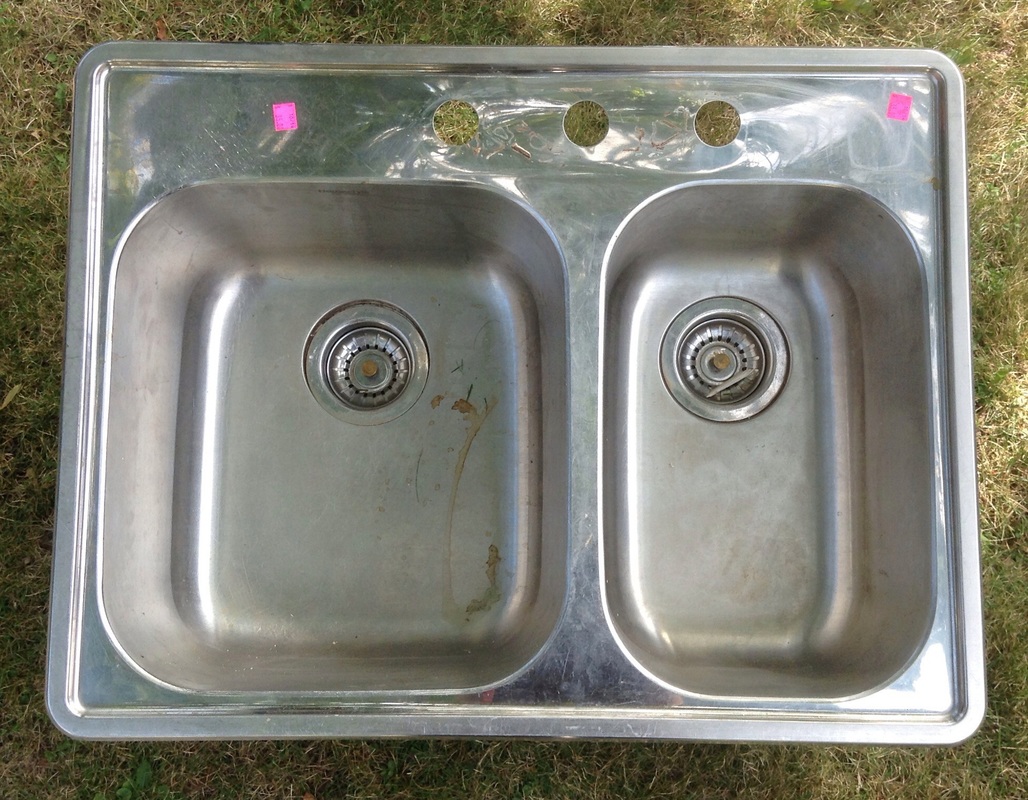
I measured the bench so that the sink would just fit atop the frame, and I must say, it fits like a glove. Next, I added a countertop and a bottom shelf. For these, I used the thinner slats of wood from the tops of wood pallets.
All told, I spent less than $50 on this potting bench. My only costs were the decking screws and the stainless steel sink. Aw yeah. As a finishing touch to my potting bench, I added a very special detail. When Dan and I got married in 1999, Dan's Opa Koopman made us two Muskoka chairs as a wedding gift. Over the years, we've enjoyed many balmy afternoons in the comfort of these chairs, and inevitably, the chairs have become weather-worn and the joints have weakened. One chair didn't survive our move from west Hamilton to east Hamilton, and the other came apart last summer. Opa has been gone for almost ten years now. And maybe it's silly, but I want to hold on to that broken chair - or pieces of it at least - in memory of him. So I got the idea to incorporate some of the pieces into my potting bench. Now, the top of the bench is made from the arms of Opa Koopman's Muskoka chair, and it holds the treasured garden tools I received from his grandson for my 30-something-eth birthday. I am over-the-moon happy with my potting bench. It spent the winter under a giant tarp to protect it from snow and cat pee, and now it's in perfect shape for gardening season. I've been using it already, usually with a giddy grin on my face and a wink for Opa Koopman. 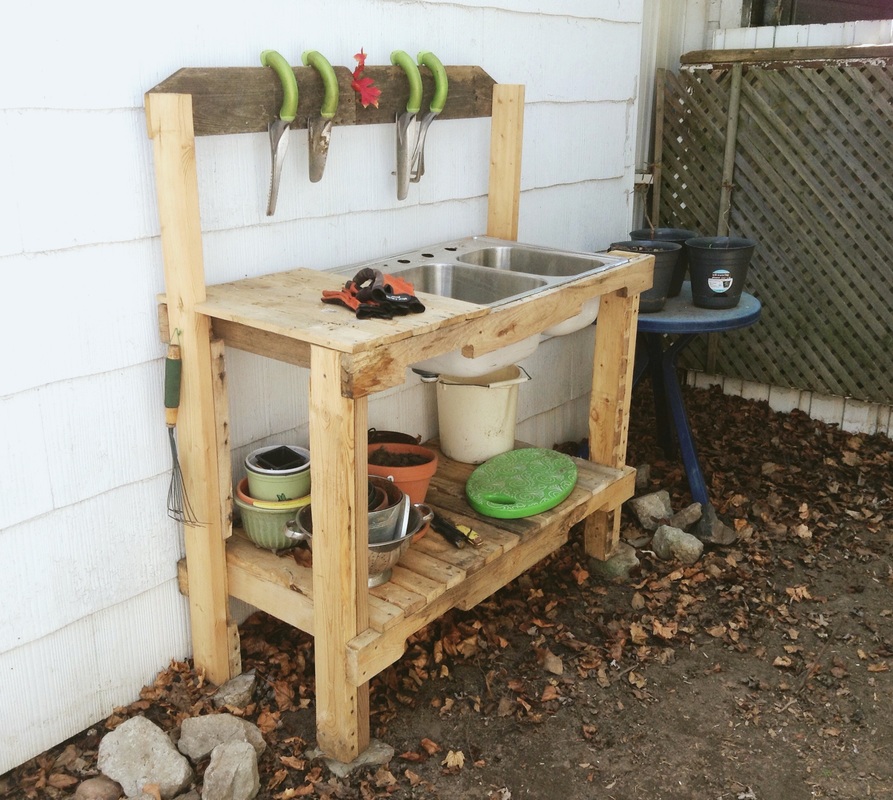
1 Comment
The latest phase of my (almost) free kitchen update isn't super glamorous, but it's very exciting: a pivotal stage in the transformation of my 1940's kitchen. If you're not caught up on what's happened so far, you can read all about it:
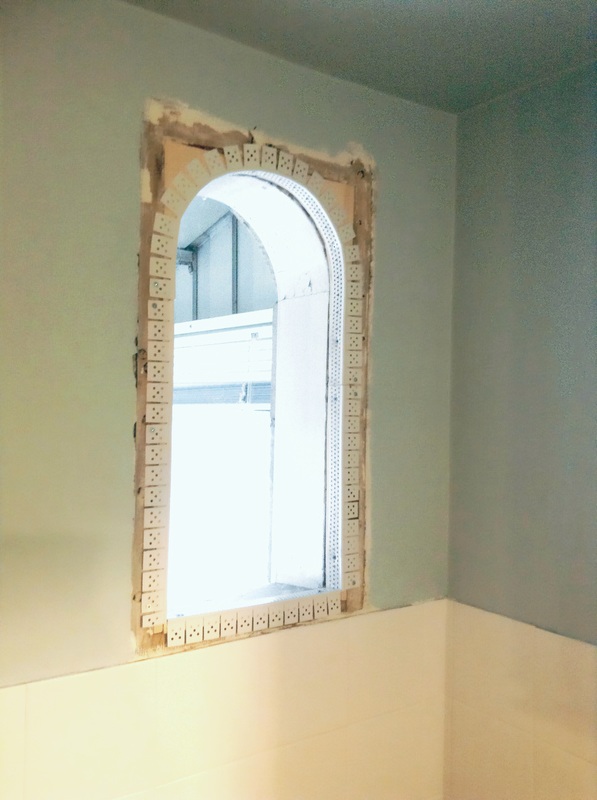
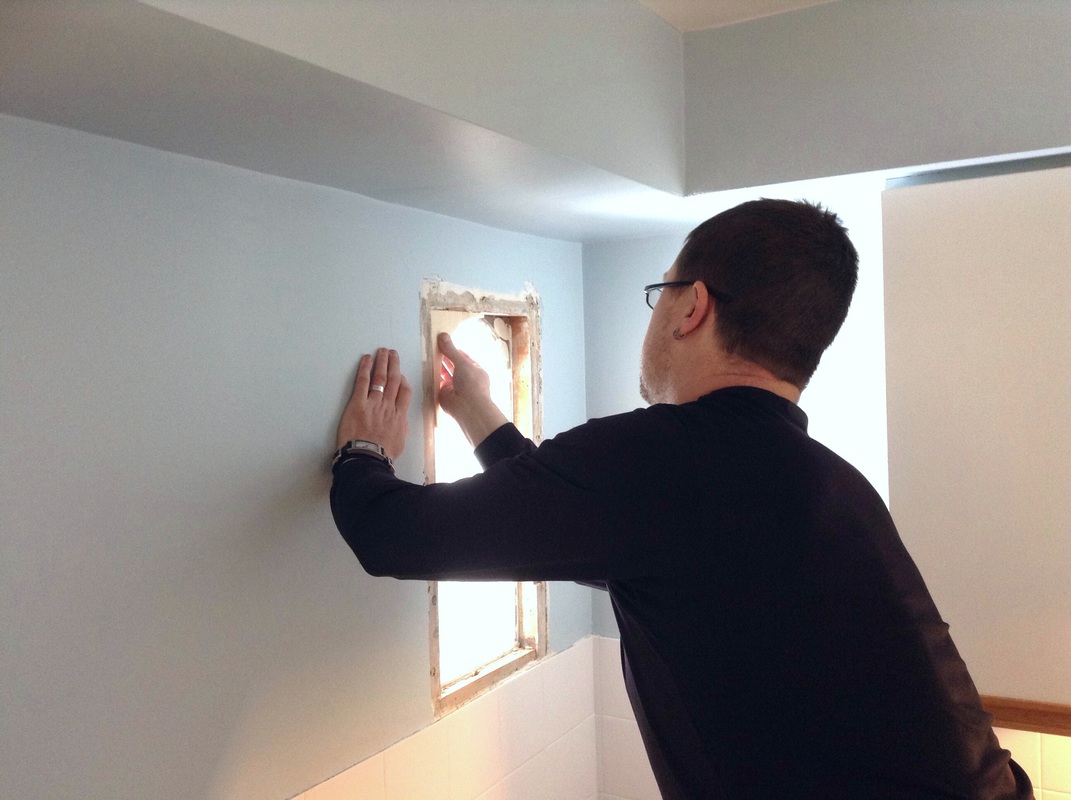
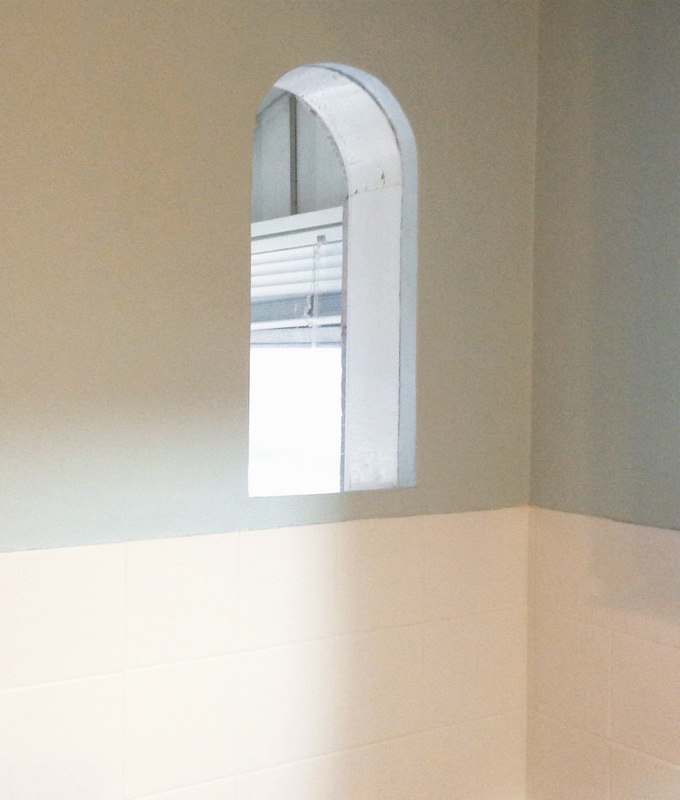
With the window set in its nice new frame, we had to decide how to finish it off. We talked about different trim configurations, but in the end, I figured it would look best with no trim at all. The wall space around the window is pretty insubstantial, and with the shelving I plan to add to the space, I think window trim would have looked way too busy. Now my dilemma was how to even out everything around the window: lots of seams and gaps, and about a 1/4" depth discrepancy between the wood studs and the existing plaster. I wanted the lines of that arched window to be perfectly smooth - like arched windows set into the stucco walls of an Italian villa. So I did some research, and I entered a new world: drywall accessories, and more specifically drywall corner beads. Why they're called beads, I have no idea: you certainly can't wear them, not easily anyway. But they're very useful. The pros use them to shield and strengthen internal and external corners between sheets of drywall. And to my delight, I found a sturdy vinyl corner bead that could arch!
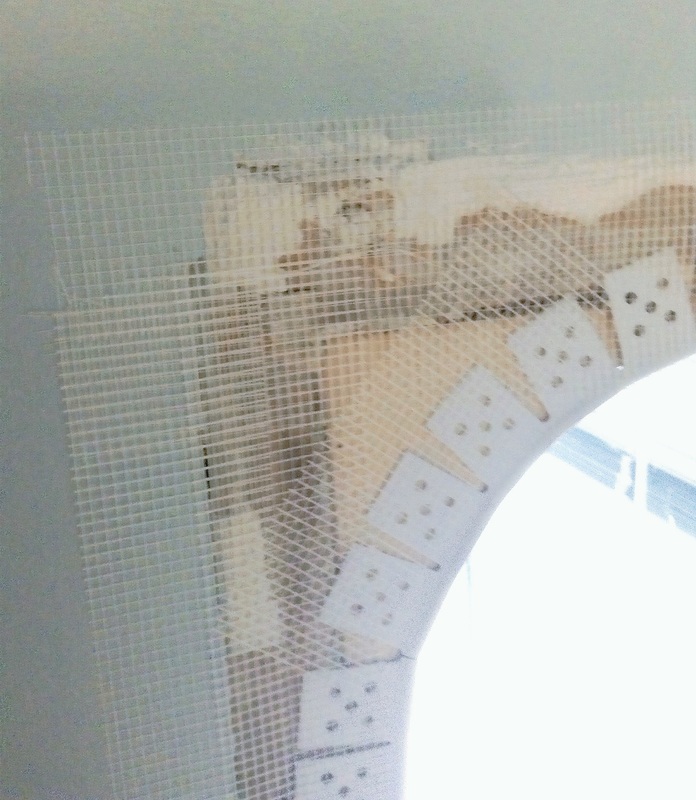
 My other splurge for this project was some self-adhesive wall repair tape. I wouldn't have been able to finish off the window without some sort of wall repair product. I had some really old and rather disgusting-looking wall repair tape in the basement, likely left over from the renovation 20+ years ago. But I opted to work with something a little easier and more trustworthy. (I guess I should probably just toss out that old roll of repair tape . . . or use it in some art work. Yeah, maybe I'll do that.) After affixing the repair tape to thoroughly cover all seams and imperfections, I patched over the whole lot with the compound I bought a couple months ago (in Phase 1).
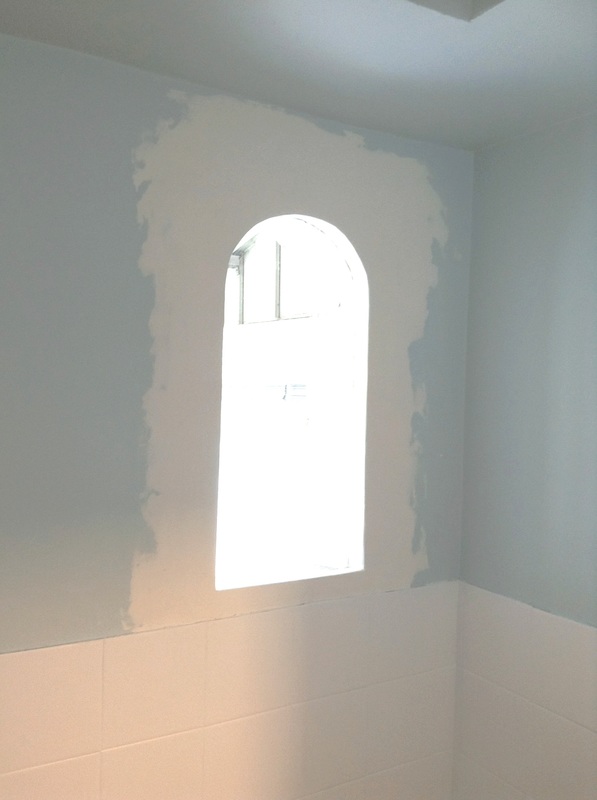
Again, sorry about the lousy photos. I used my iPad mini camera because I was too lazy to take out my good camera. After a couple coats of compound - each followed by thorough sanding - I painted the wall and the inside edge around the window. And I'm a happy girl. It looks great. 
I'm so glad the window is done. It took a lot of brain work, and wasn't as fun as building a shelf, but the results are so wonderful. Here's a little visual play-by-play of the whole process, just to put a big exclamation mark on this whole process! (Stay tuned for Phase 5: new shelves!) 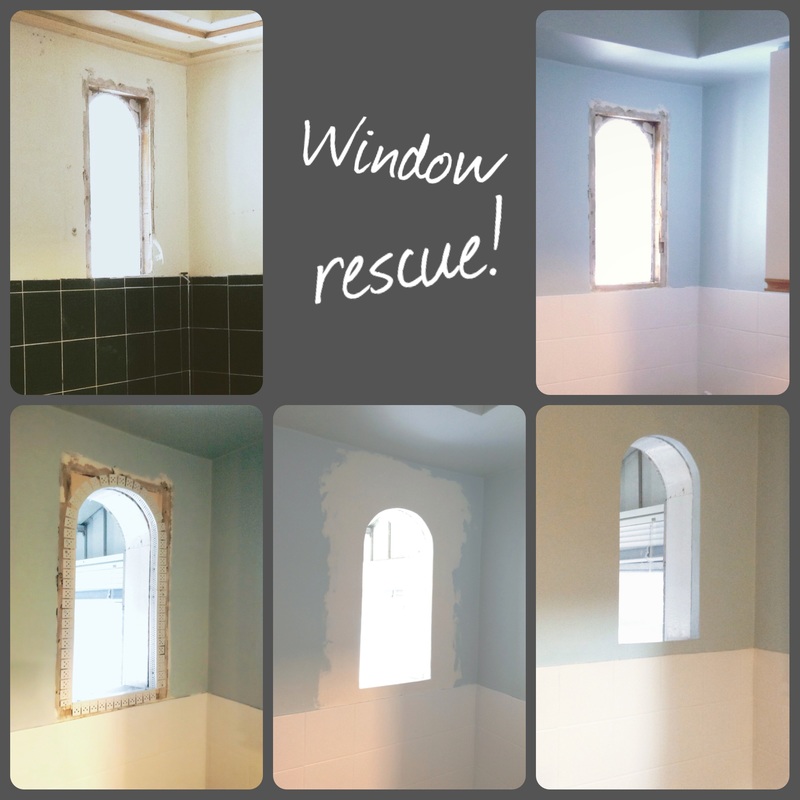  I'm so excited to tell you about the next phase of my (almost) free kitchen update. If you haven't read about what's happened so far in my crazy adventure, you can catch up here:
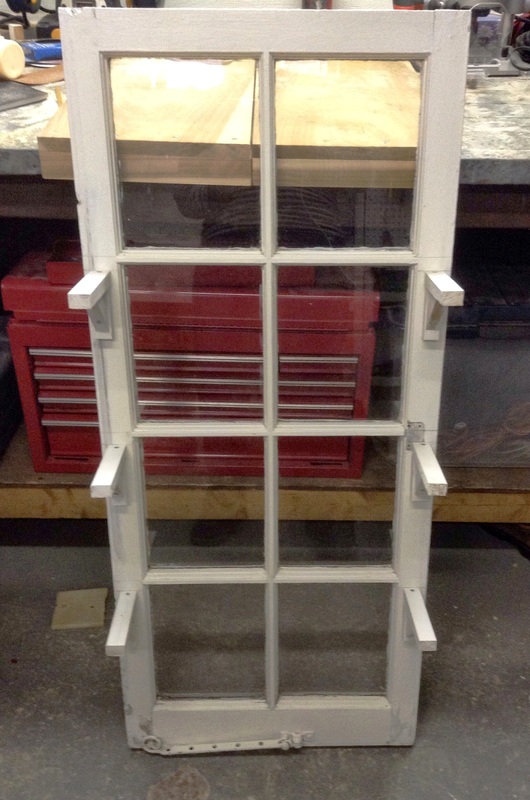
You can probably tell from the above photos that the window and the shelves were different shades of white. The white of the shelves was a pretty close match to the white I already used to paint the backsplash, so they didn't need much work. But the window clashed a little. I didn't want to paint it because I wanted to maintain its beautiful heritage and character. So, I improvised by rubbing some white paint (the same paint I used on the backsplash) over it, just to tone down the window's off-white tone. I did this pretty roughly to keep things rustic. 
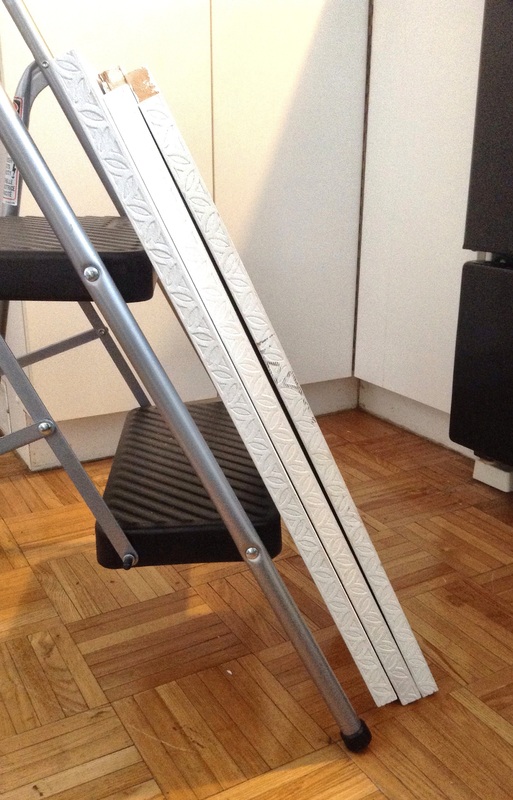
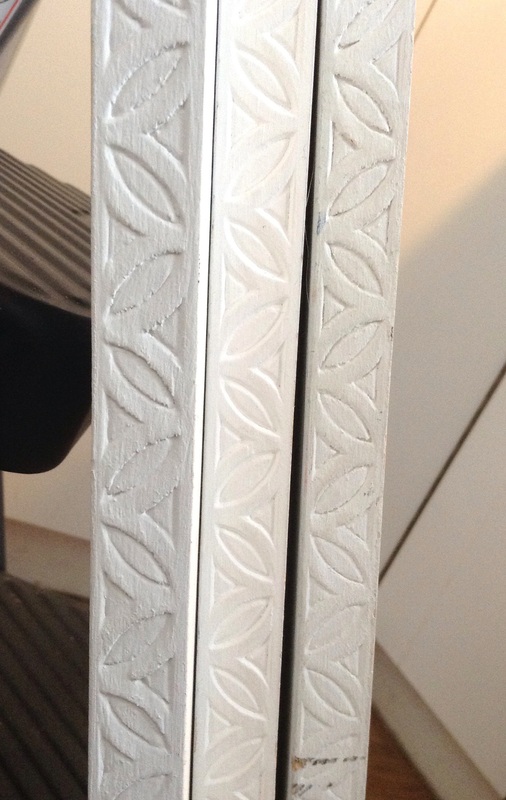
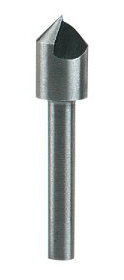
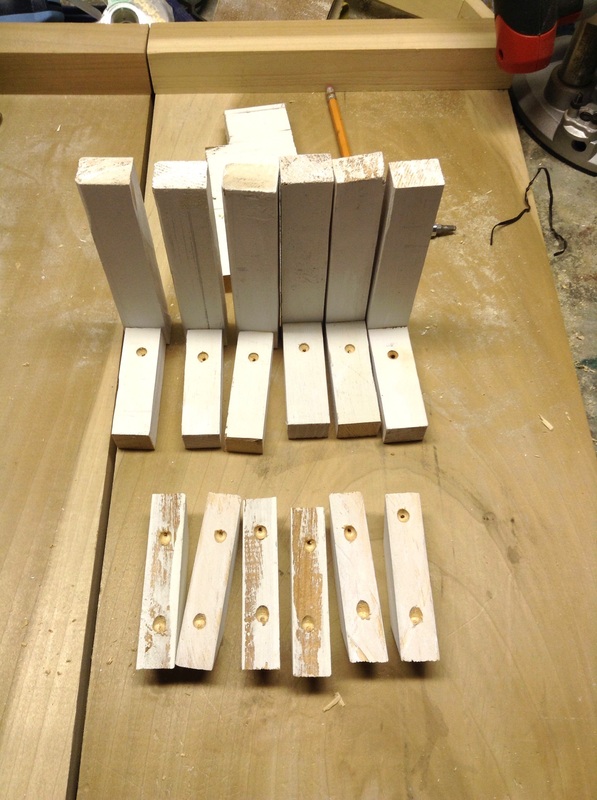
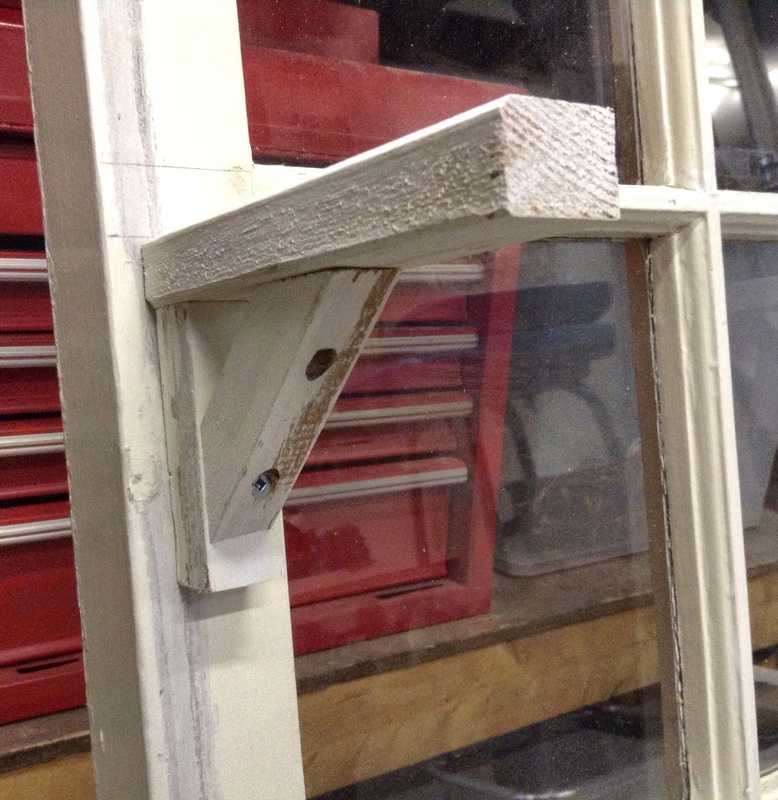
I weighed a few options for shelf brackets. I had a few kicking around in the basement, but most of them were too big. I had some white metal brackets that were the right size, but they totally detracted from the character I was hoping for. So I took to Google and Pinterest to see about making my own brackets. After looking at a few ideas, I came up with a simple design to make brackets using the off-cuts from my shelves. They're pretty basic brackets: two pieces of wood forming an L-shape, reinforced by another piece cut at 45 degree angles (courtesy of the compound mitre saw, bless!). 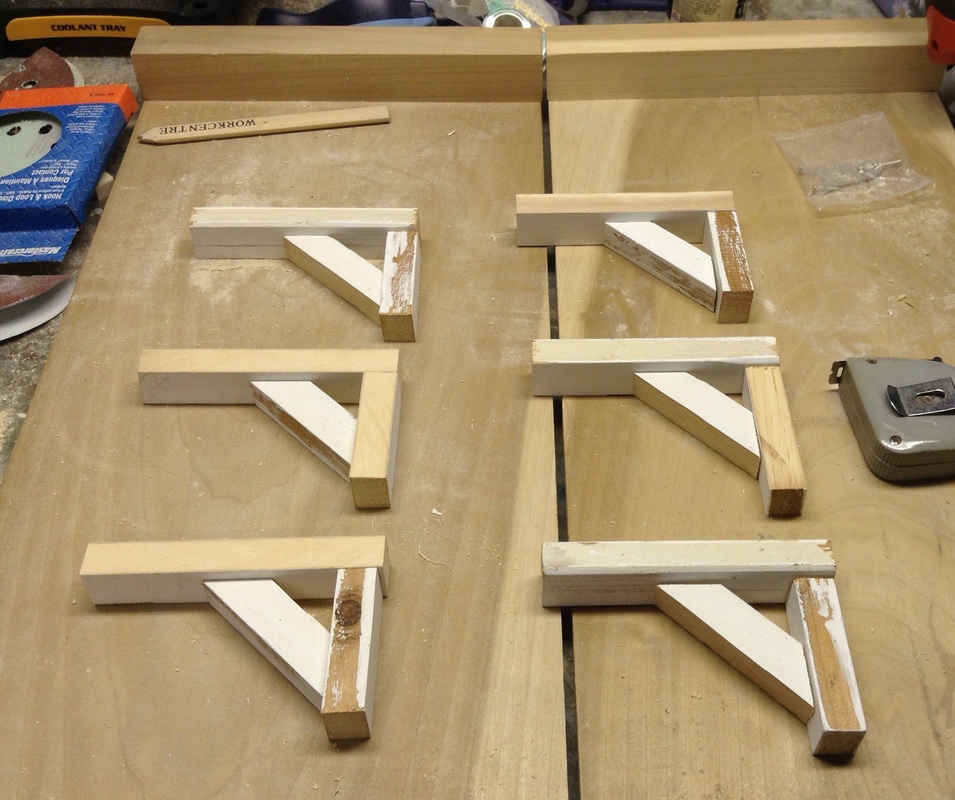 If you don't really care about how I constructed the brackets, skip this part. I won't be upset. I cut six each of 6" lengths, 3" lengths, and mitred reinforcements (I think they were 1.8" wide at the narrow edge). Using the same expert painting technique I used on the window, I roughly rubbed some white paint over all the pieces to match them to the window and shelves. I glued the straight pieces together into an L-shape, and later reinforced the joints with wood screws. I marked and pre-drilled all the holes where more screws would go to assemble the brackets and attach them to the window. Pre-drilling prevents the wood from cracking when the screws go in. Part of my pre-drilling process was to use a countersink bit, which creates an inverted conical depression in the wood so the screws sit flush with the wood.
I screwed each L-shape to the window and made sure each was level before attaching the mitred reinforcements. I won't go into all the details because this isn't a tutorial (and I'm certainly not qualified to give a tutorial on this), but hopefully you get the general idea. Anyway, here's how things looked with the brackets fastened to the window before I attached the shelves.
With brackets firmly affixed, I attached the shelves to the brackets with wood screws. Once again, I pre-drilled and used a countersink bit. Once the shelf was assembled, I had to get it up on the wall. As you can imagine, this shelf is pretty sturdy and heavy, so it had to be anchored to a stud. And let me tell you, finding studs behind plaster walls is very challenging. We tried a couple stud finders (which Dan is always quick to remind me, never fail in finding him), but got nothing conclusive. So in the end we took an educated guess that a stud would be sitting 16" away from the side of the door. And thank goodness, we were right. The shelf is now solidly in place, and I'm ecstatic. 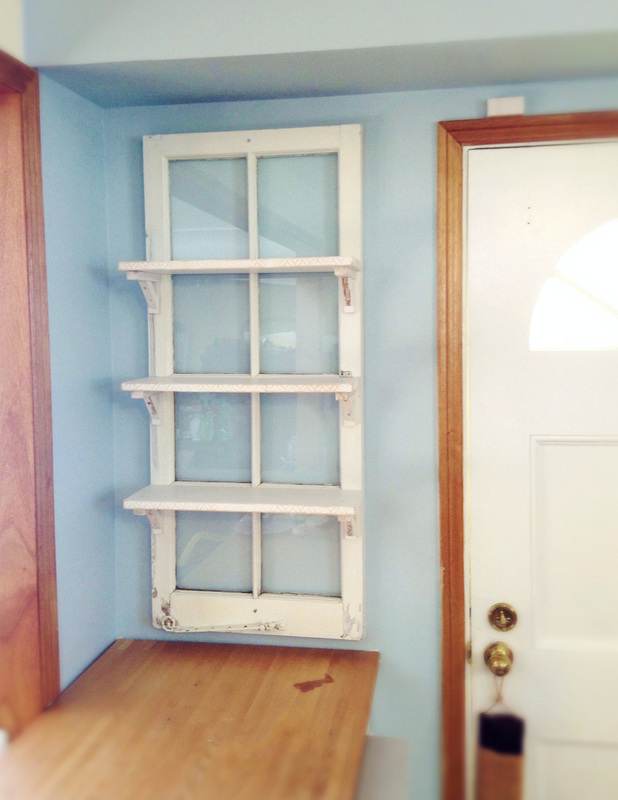 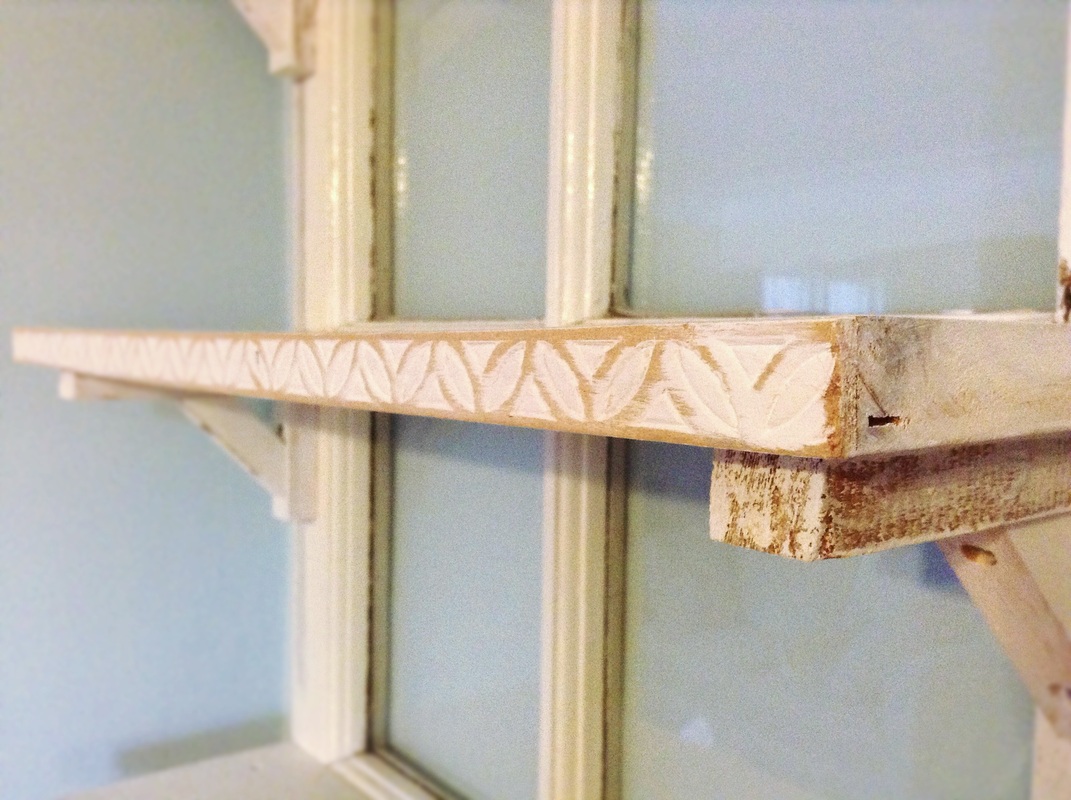  I'm so happy with how it turned out. I love how the reflective surface of the window panes add brightness to the kitchen. I love how the embossed details on the shelf edges complement the ruggedness of the window. And I'm quite fond of my quirky makeshift brackets. Dan and I have both been pleasantly surprised with how much the shelf holds. Almost all the contents of my old pantry cabinet fit on the shelf. 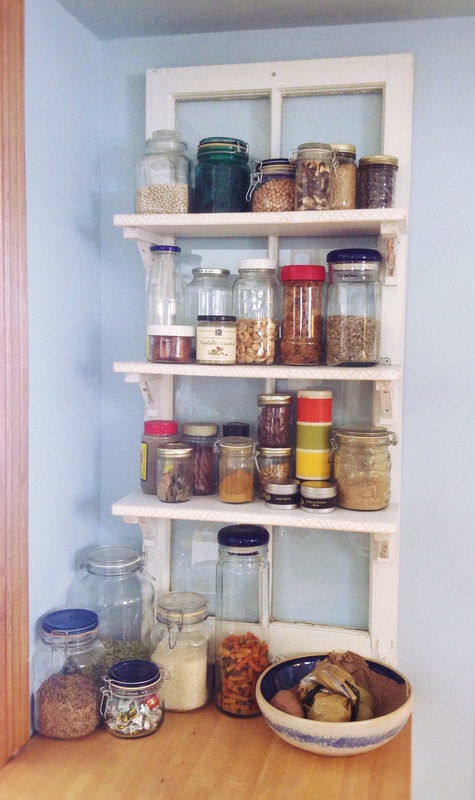 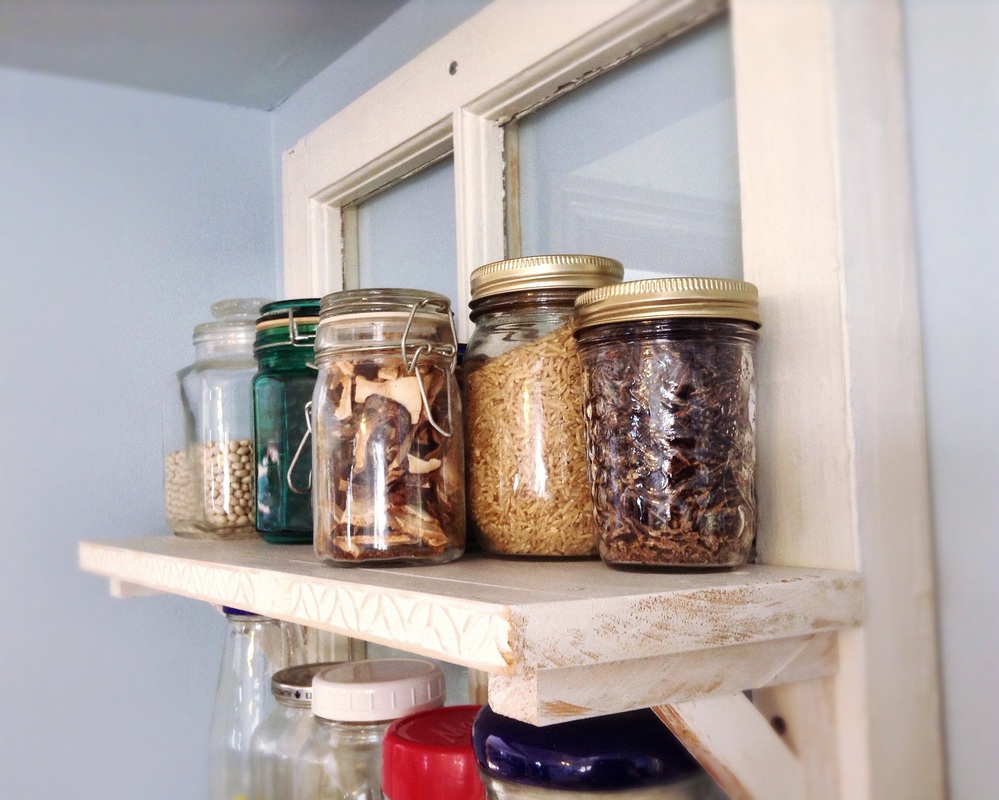 This is going to sound ridiculous - and it probably is: when I come downstairs in the morning, and turn into the kitchen, the shelf is the first thing I see, and I literally feel my heart lift. It is so much lighter, brighter, and more colourful than what was there before. 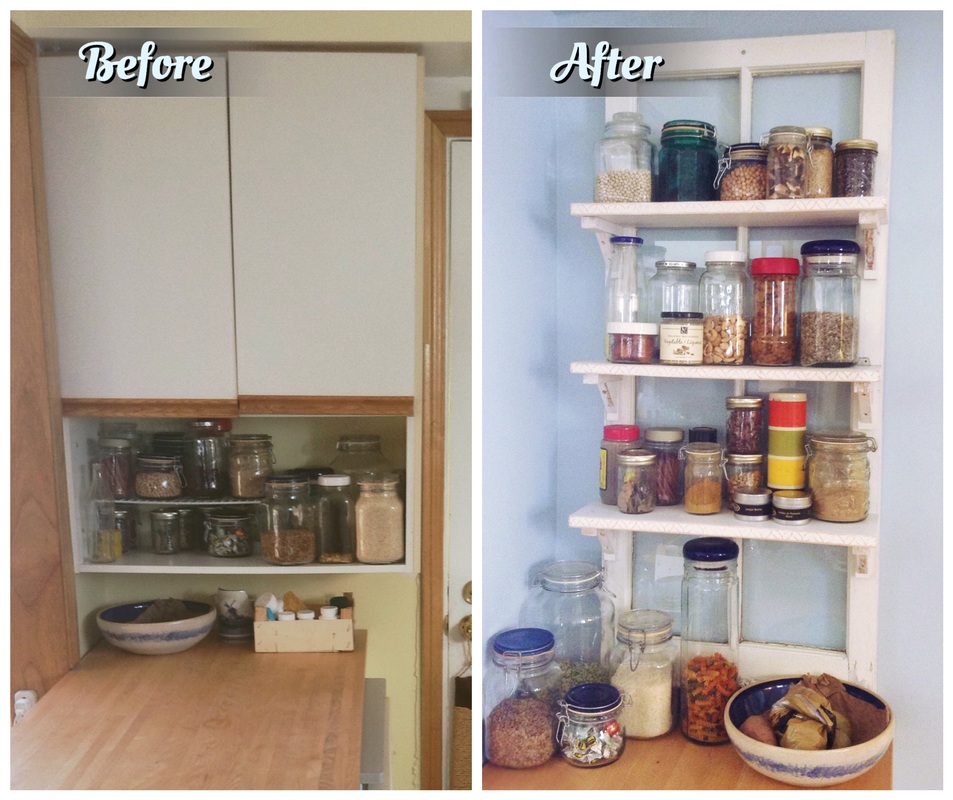 And of course, it's so much more unique and interesting. I spent absolutely nothing on this project, except my time of course. Even the wood screws were left over from other projects. So here's where my spending on the kitchen (almost) free transformation stands at this point: The Almost Part (including taxes) $ 100.64 spent to date + 0.00 (old window pantry shelf) $ 100.64 Next, I need to trim up the lovely window that I uncovered by removing cabinets. This will be another adventure because I know nothing about trimming windows, and the window is arched. For my mathematically challenged self, this should be interesting to say the least. And now for one more fancy Pinteresting process collage of my old window pantry shelf . . . 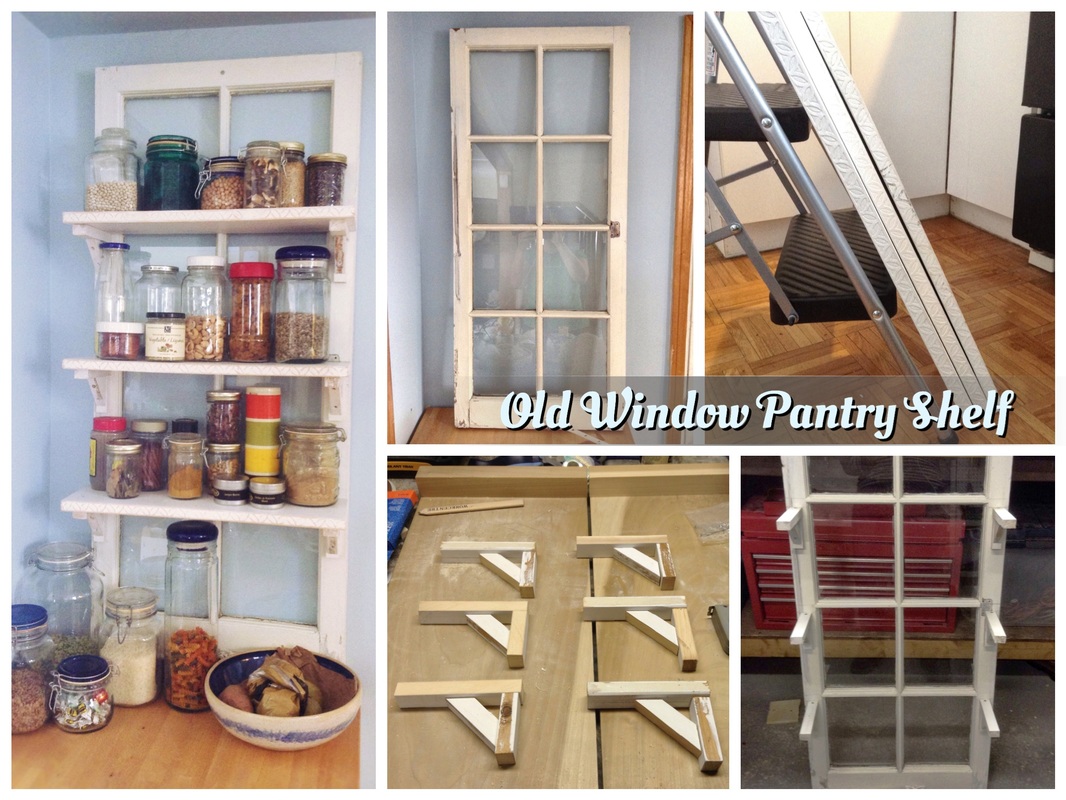 I'm well into my (almost) free kitchen update now, and so far, so good. If this is your first time reading about my crazy project, you can catch up here: With the cabinets down, I have focused on repairing walls and painting. I'm going to start on the half of the kitchen where I've removed the cabinets, and once I have finished all the work on that side of the kitchen, I'll paint the other side of the kitchen. Before painting the walls, I wanted to deal with the forest green monster that is our backsplash. Seriously, I think if we were to do a scale comparison between Fenway Park and my kitchen, the green monster at Fenway would be shrimpy compared to my backsplash. 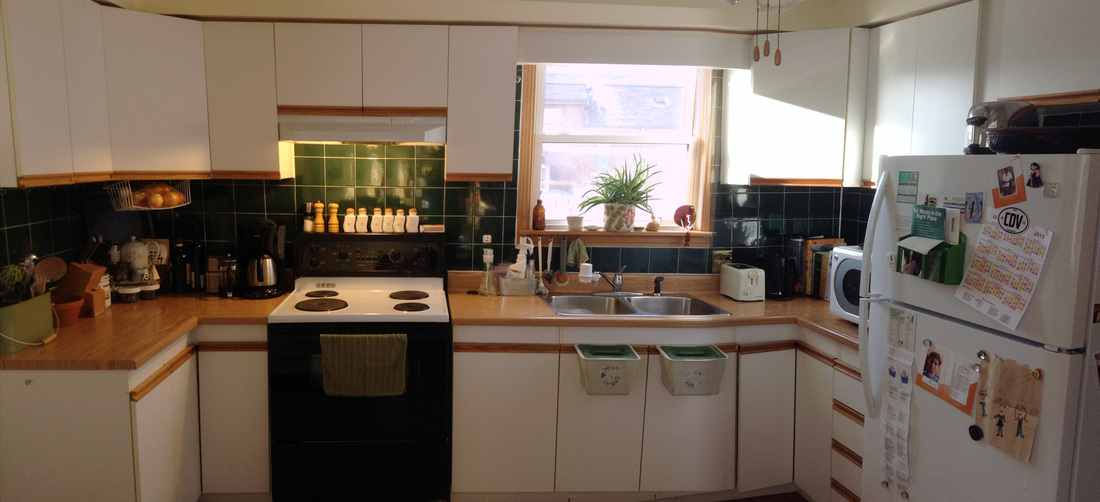
Sheesh.
The first thing I had to do was chip away an extra couple inches of tile that had been installed to meet up with the original cabinets. Taking the entire backsplash down would have created a big mess and a lot of repair work, but I could handle a few inches. So I got out a hammer and chisel and went to town. 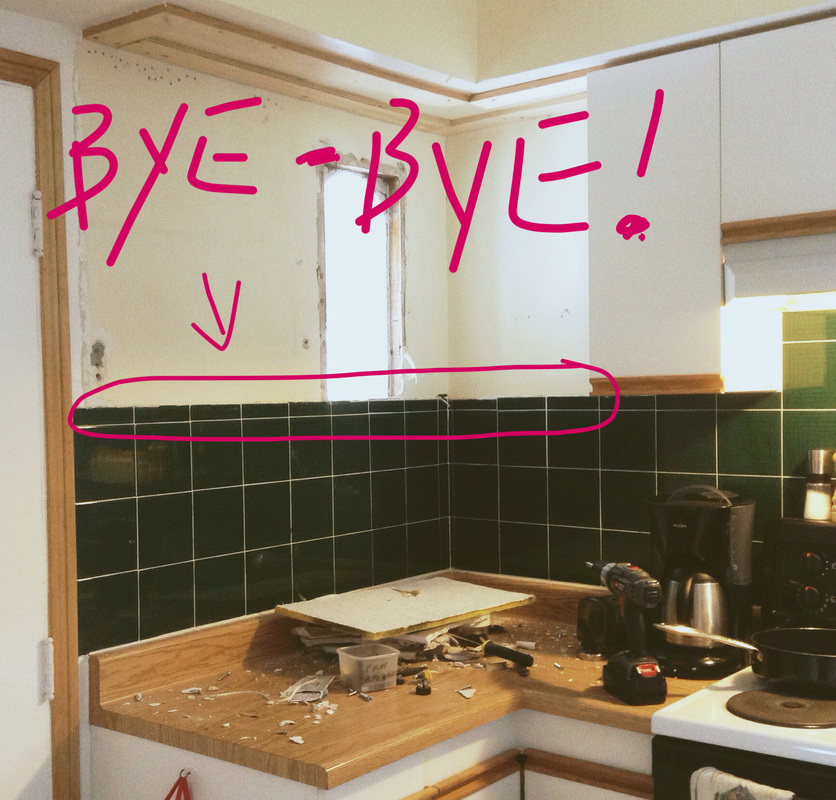
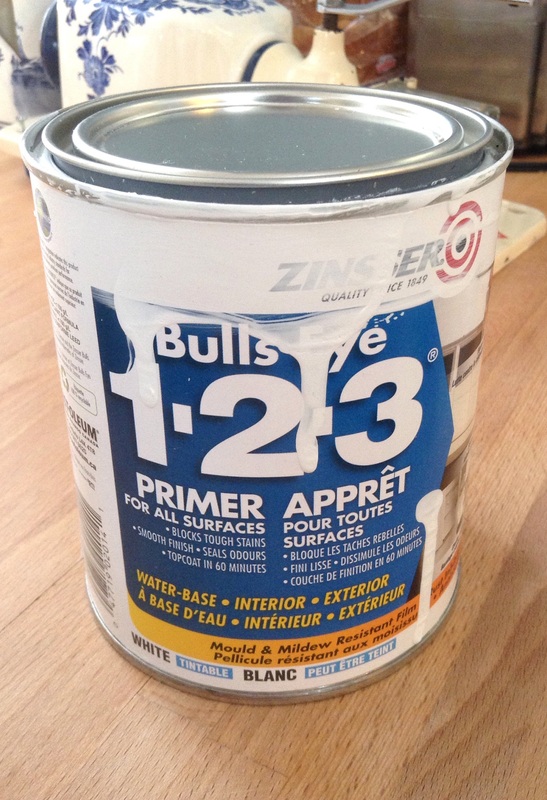
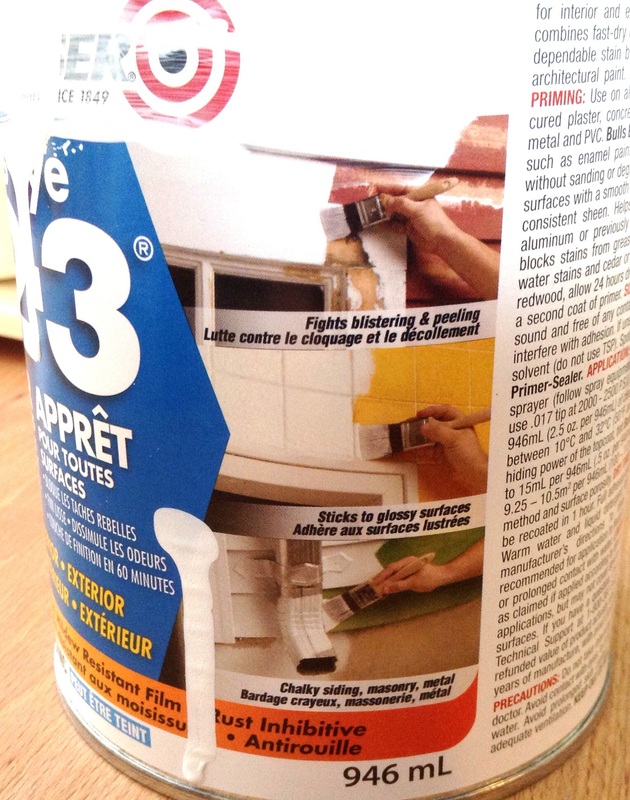
I considered several options for covering up the rest of the backsplash. Pinterest is rife with clever ideas for covering over the tile with materials like barn board, pallet wood, corks, aluminum flashing, and even pennies. These options were either more work or more money than I wanted to commit. One option I seriously explored was to cover the backsplash with off-cuts of bamboo flooring left over from redoing some floors in our upstairs. It would have looked kind of like subway tile. I laid out all the pieces we had - and it looked super cool - but in the end, I just didn't have enough off-cuts to work with. I suppose if I was really determined, I could have found a way to make it work, but I'm not that ambitious. So in the end, I opted for paint. Boring, I know. I kind of feel like I compromised cleverness for convenience. But when it comes down to it, I really want the backsplash to take up less usable space, and paint is probably a good method of accomplishing that. I had some leftover heavy duty white paint in the basement that I could use, but first I needed to invest in a super duper primer that could deal with the glossy surface of ceramic tile. I did some research, and landed on Zinsser Bulls-Eye 1-2-3 Primer for all surfaces.
Before painting, I scrubbed down the tile with hot water with soap and vinegar to make sure all the grease was off the tiles. Then, using a foam roller for a super smooth finish, I rolled on two coats of primer, followed by three coats of my leftover white paint. Now, there are a lot of conflicting opinions about the success and effectiveness of painting tile. So I have no guarantee of the longevity and durability of my choice for coverage. But from what I can tell so far, that primer has stuck to the tile with true affection: no peeling away, flaking, or bubbles. I've already wiped splatters of tomato sauce off of the backsplash, and the paint has held up with no problem. 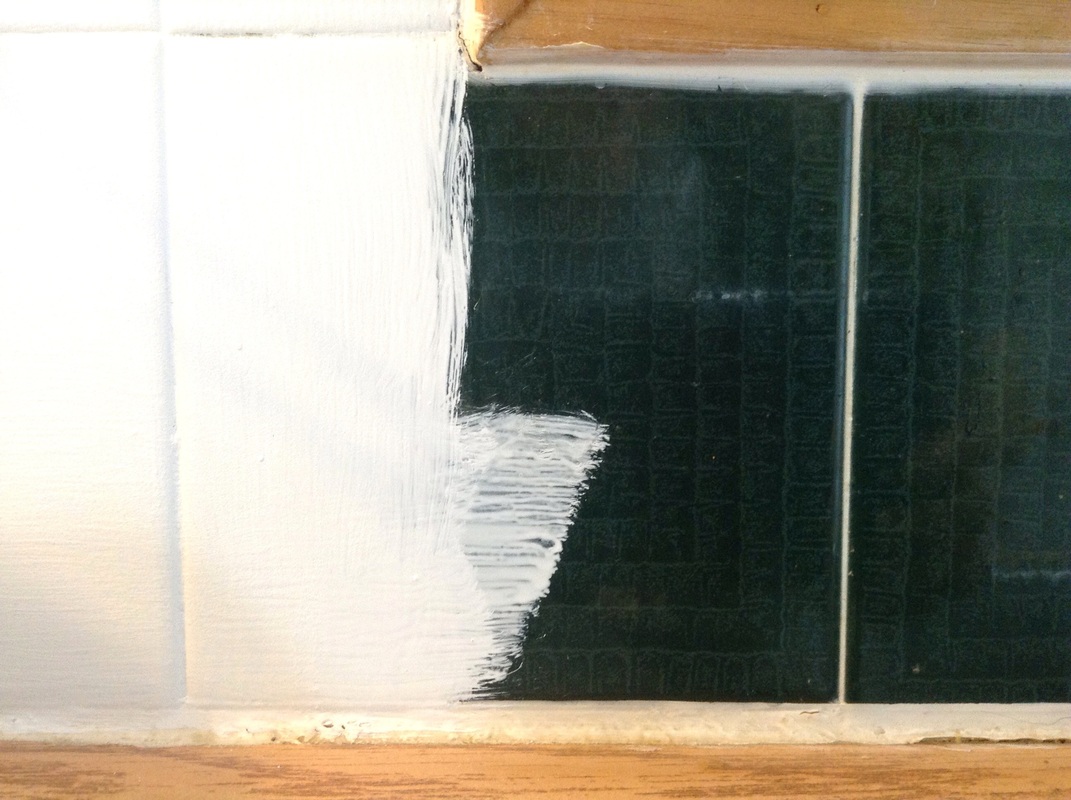
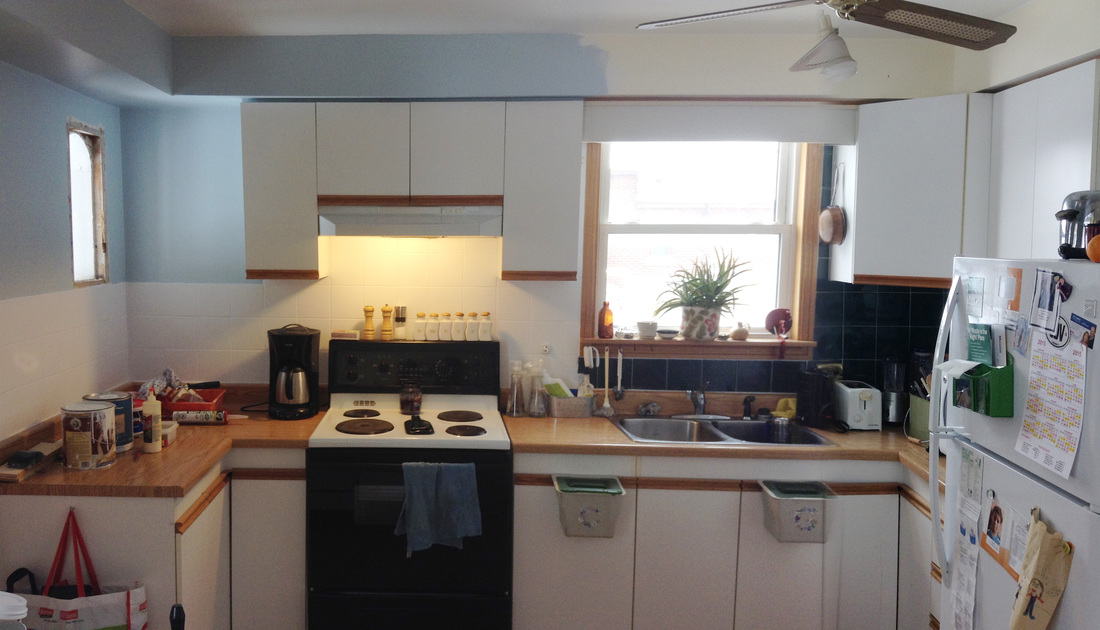
The true test of the paint's durability over the years will be on the backsplash around the stove and sink areas. I'll keep you posted . . . . And now for the walls. I had intended to use more leftover paint on the walls, but Dan weighed in on this one. Most of our downstairs is painted in shades of muted yellow. It's a bit weird, actually. Dan convinced me to shell out some cash for a can of paint so that we could stop the yellow madness and completely change the colour of the kitchen.
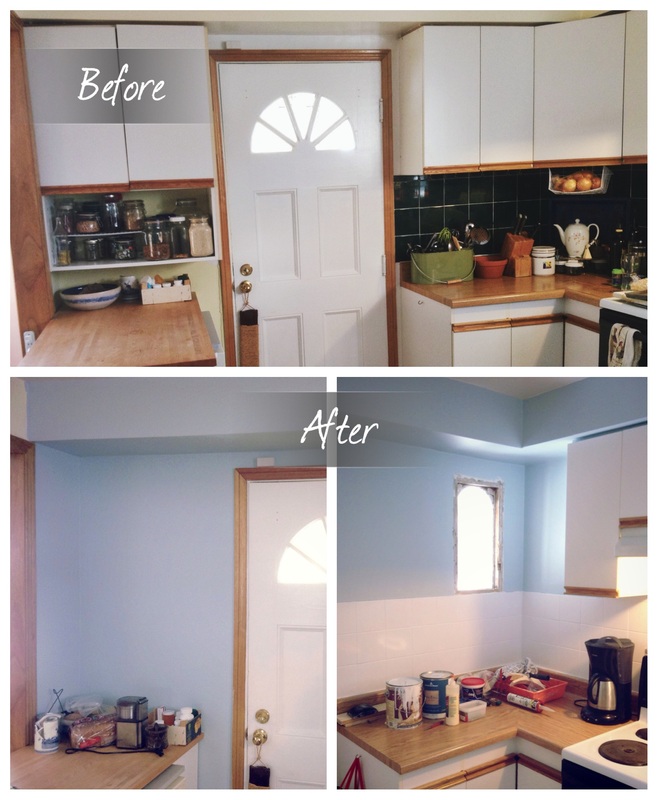
. . . and another before and after (well, half way, anyway) . . . 
Sorry about the mess and the subpar photos.
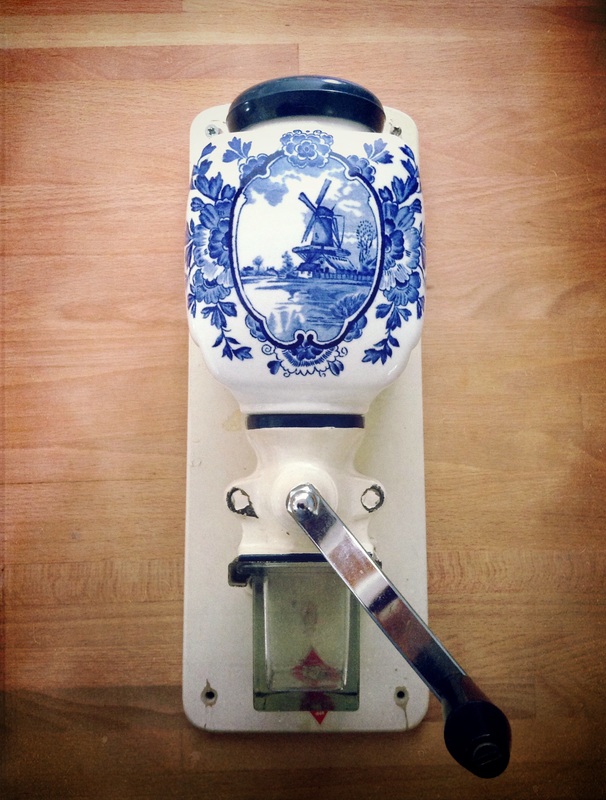
I'm still getting used to the colour. It feels really blue. But I think adding shelves and whatnot will even out the effect a bit. I do love how the white tile and blue walls work together. And the coffee grinder will fit in quite nicely. So now for the budget update on my (almost) free kitchen update . . . The Almost Part (including taxes) $ 13.65 spent to date + 13.55 (Zinsser primer for tiles) + 73.44 (Benjamin Moore paint for walls) $100.64 By now, you might be crying fowl: "Hey, isn't this supposed to be a free update? You haven't done anything free yet, you fraud." Well, just you wait, my friend. The free stuff is coming next. Are you excited? I am. I have broken out the power tools (well, a drill) and started my free kitchen update. If you'll recall from myearlier post, the first task I set out for myself was to take down some cabinets along the front wall of our house. One of the cabinets was coming out of the bulkhead into which it was anchored, and the other cabinets covered a window I desperately wanted to uncover. Armed with my drill, I took off all the cupboard doors and then removed all the screws that attached the cabinets to the wall and to each other. For the most part, the cabinets came down pretty easily . . . a little too easily in some cases.
Before we made that change, the cabinet was already sagging a little, but I think we probably made it worse, despite our efforts to reinforce it. I took this photo after I removed the cabinet, and it shows how badly the cabinet had been sagging, probably 3/4" where it met the wall. When I removed the wood after taking this picture, the screw in that corner literally fell out of the bulkhead. 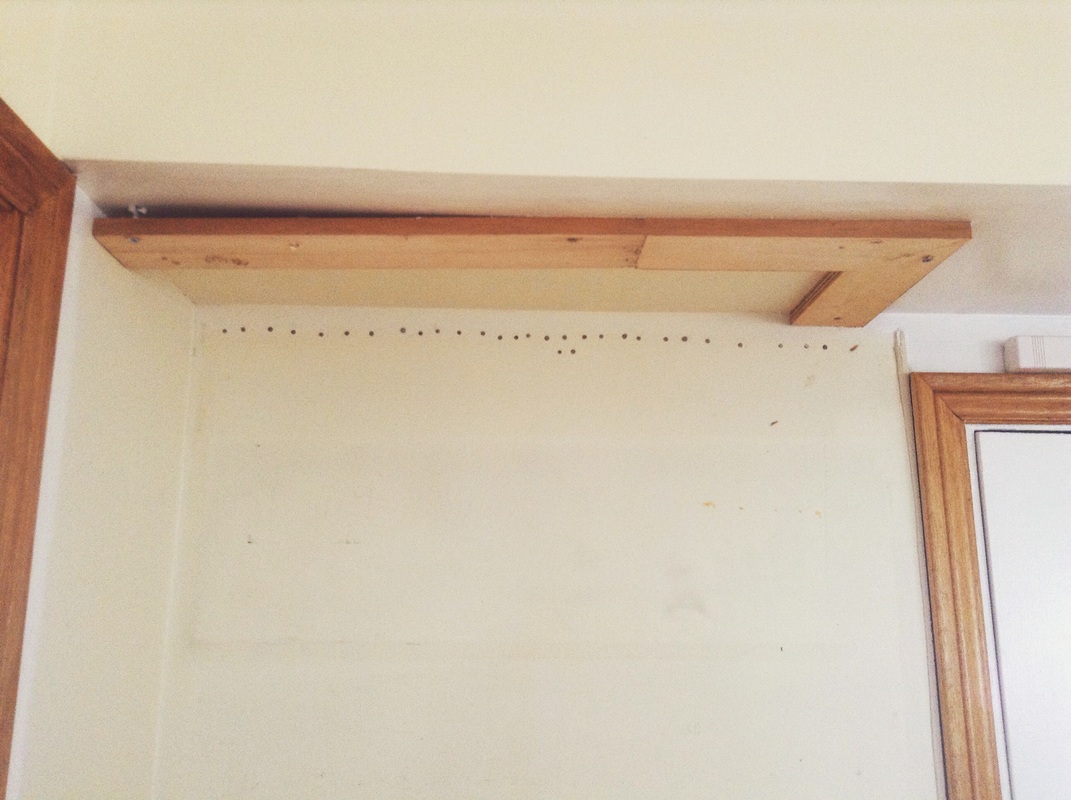 With the cabinet gone, I learned a little more about the curious construction of our kitchen. Besides the screws that Dan and I had added to the cabinet when we cut out the bottom a few years ago, I counted three screws: two in the wood trim thingy on the bulkhead and one in the wall. Yikes. I suppose the original construction of this pantry cabinet was reliant upon the support of the floor. But still . . . three screws? And then there's the wood trim - or whatever - between the cabinet and the bulkhead. I always assumed there was a solid piece of wood there, for aesthetic impact or something - and when I took down the cabinets, I was amused to discover what it really was: 1x4 plywood. I have no idea what purpose it served. Any ideas? Another mystery behind the cabinet was the line of nails at the top of the wall. I have no idea what that's about.
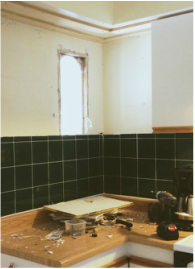
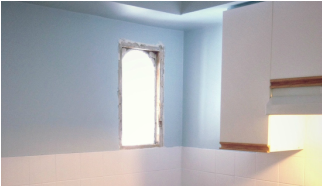
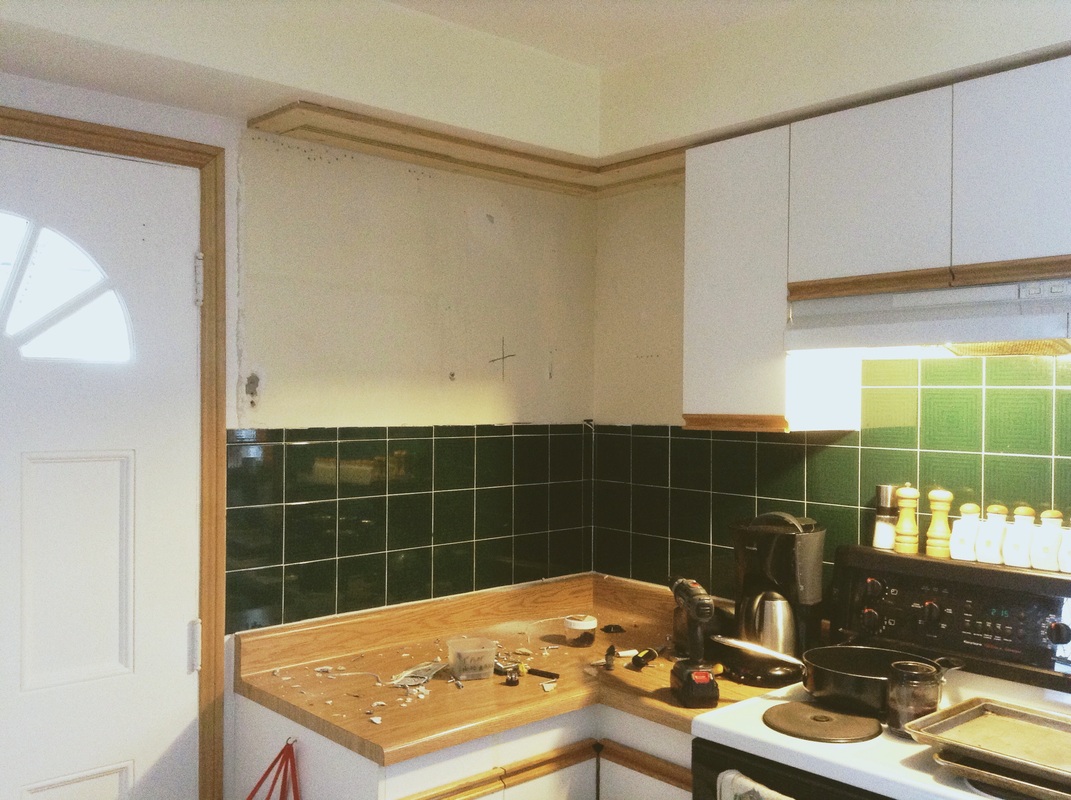 I haven't done the dishes. Too excited to rip out cabinets. . . . sigh. No window, at least not yet. Cracks in the wall gave a clear indication of where the window was hiding - x marks the spot - so I got a drywall knife from our workshop and got to work. Carefully. The drywall in front of the window came away easily and revealed another hilarious discovery: the space between the window and the drywall was insulated with a ceiling tile. Maybe that's a normal contracting hack. In any case, the mystery was finally revealed . . . 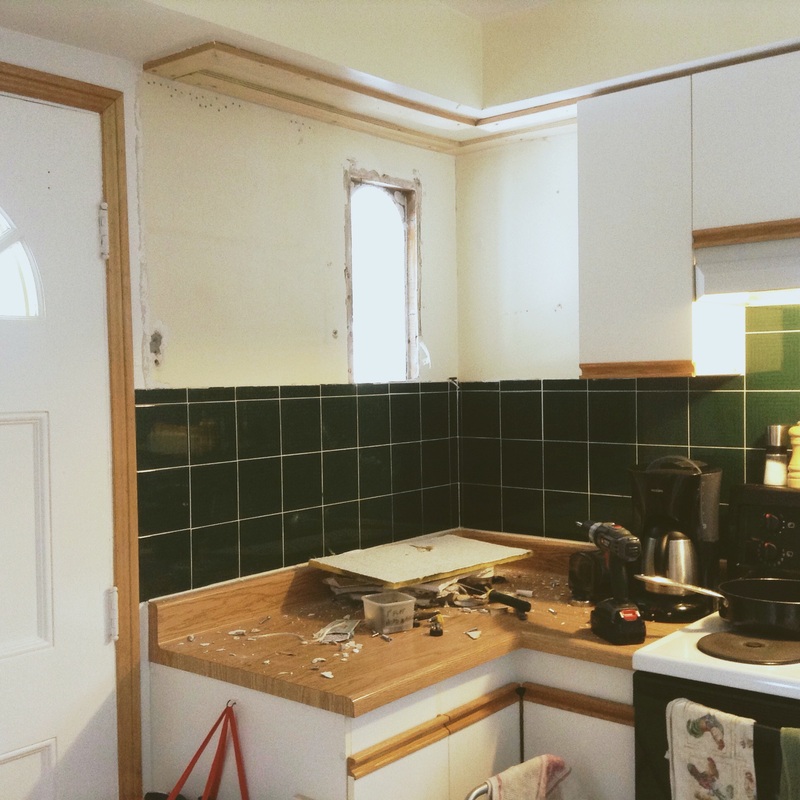 . . . Ahhhhhh (cue the singing angels). There it is. My window.
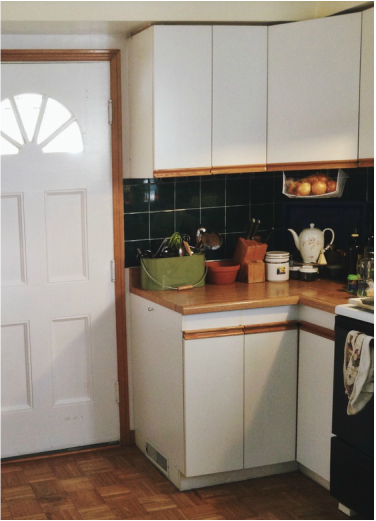
See the ceiling tile? Heh, heh. The window is in good shape. We need to tidy up the framing, but otherwise, it is better than I could have hoped for. I'm so thrilled to have this source of light freed up to brighten my kitchen. As you can see, the walls need some work, so I have had to spend a little money for some spackle. I have also had to shell out for some spray foam to seal a big gap - previously covered by the pantry cabinet - between the wall and the trim on the left side of the front door. So, here's what I've spent so far on my (almost) free kitchen update: The Almost Part $7.49 (spackle) + $4.59 (spray foam) $12.08 + tax $13.65 Next comes repairing and painting walls and dealing with the hideous backsplash. And I'll get to do it all while basking in the light from the front window. Our kitchen is a vintage beauty. If you love the 80's. The 1980's.  I have wanted to change our kitchen since the day we moved in, but from the outset, I have resigned myself to living with it. The changes I really want to make involve an architect, a sledge hammer, a contractor, and lots of money: the only one of those things I have at this point in my life is a sledge hammer. The kitchen is in pretty good shape, but it's not as functional as I'd like and much uglier than I'd like. When we moved into our house eight years ago, Dan and I had decided we wouldn't do anything to (read, spend money on) the kitchen until we could do it all and do it right. That worked for a while until a couple years ago, when I resigned from my 9 to 5 job to work from home as a full-time artist. This change in lifestyle has entailed that I spend a lot more time in the kitchen because, now that I work from home, I can work cooking and baking into my schedule pretty easily. And I love it. One of the best changes of my new lifestyle has been my ability to have time to cook and bake. Now that I spend more time there, the kitchen's flaws irk me all the more. The biggest problem is that it is dark. The other issue is the poor use of space. Oh, and it is ugly. 80's big hair ugly. This past summer, I used scrap materials, like old pallets and cupboard doors, to build a few things. All it cost me was time and a bit of money for paint and some wood screws. So I got to thinking I could apply the same tactics to my kitchen, just to give it a facelift and make it a nicer place to be until we can afford to make it exactly what we want. And I can do it for free (almost), using scrap materials and stuff I already have around the house. I know I'll need to spend a bit of money on some essentials, but otherwise, I won't spend anything but my time. Kitchen Update Priorities As I've already mentioned, there's plenty to change in my kitchen. So for this free update, I need to focus on what's manageable for my non-budget. So, I'm ignoring the terrible floor (parquet flooring in a kitchen is not a good idea), the dated countertop, and the non-plumbed-in dishwasher (we have to wheel it over to the sink each time we run a load of dishes). These three priorities will guide what I do in this free kitchen update project:
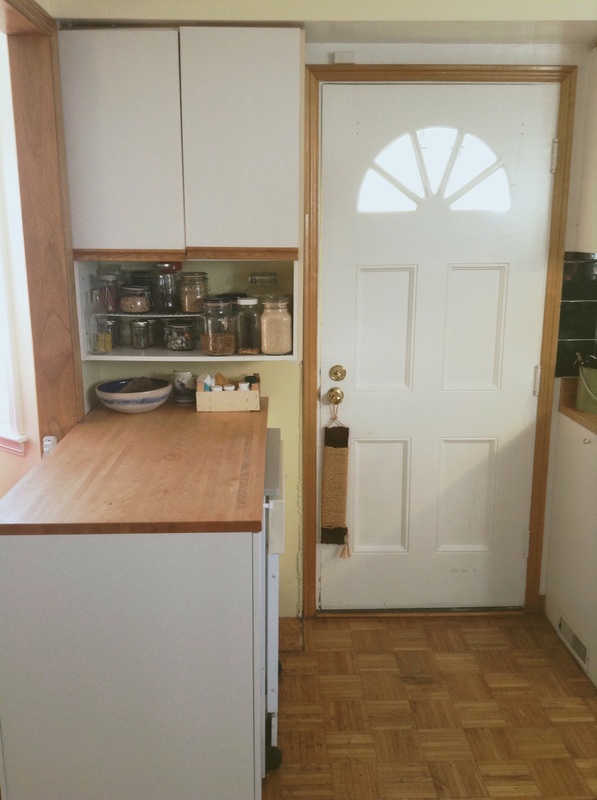
Brighten it up The first thing I'll do to brighten up the room is to uncover a window that was sealed up by cabinets when the kitchen was updated in the 1980's. In the original 1940's layout, this wall of cabinets was actually the front hall, separated from the kitchen by a wall. 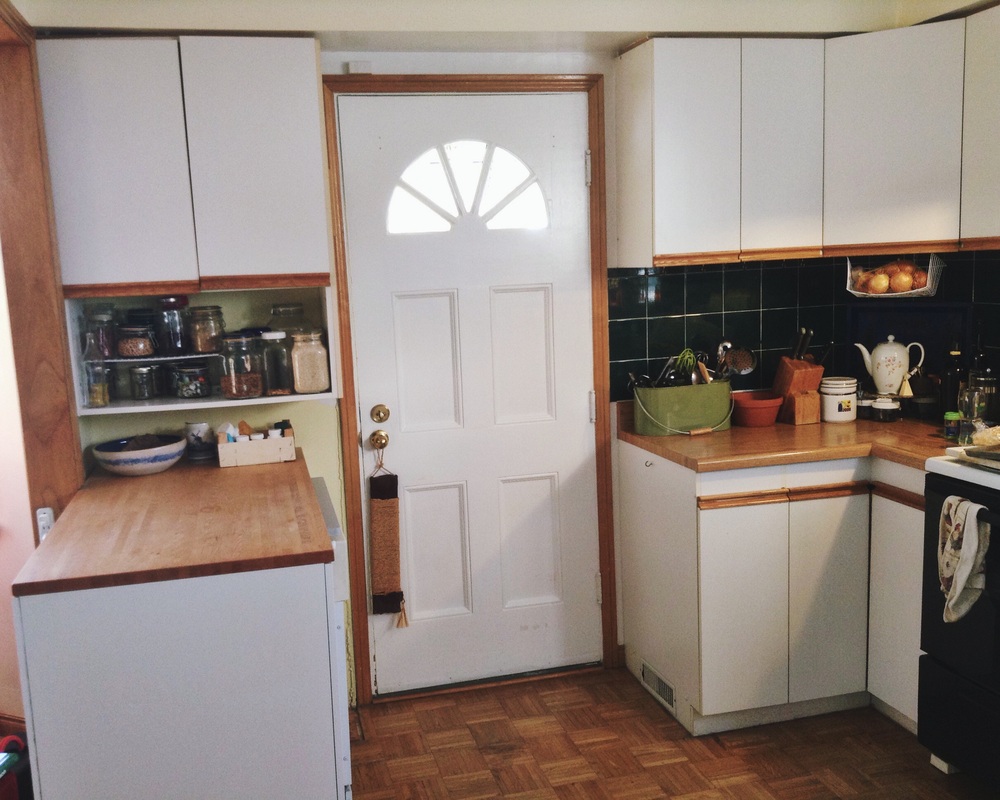 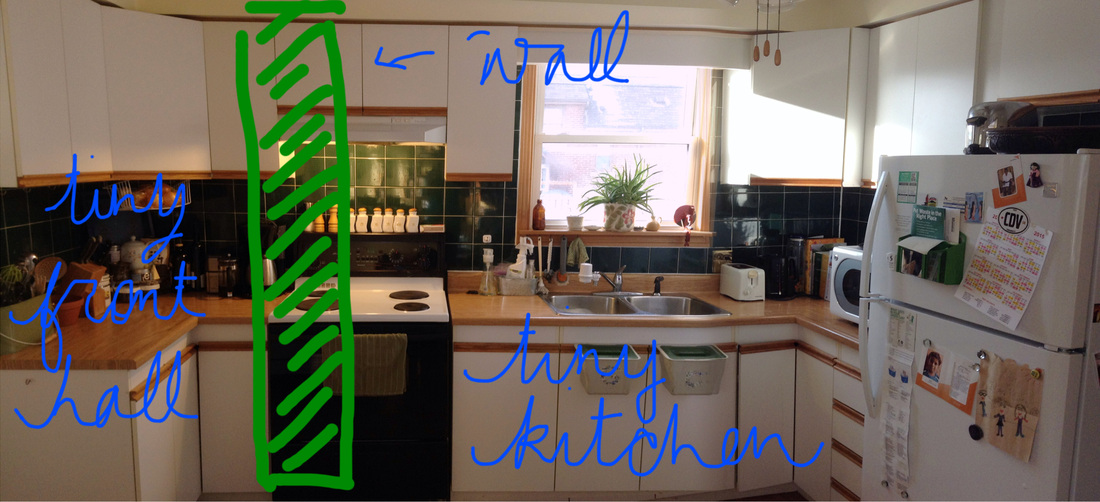 Fancy drawing, eh. All 1940's houses like mine have a cute window beside the front door. When the previous owners ripped down the wall and made the front hall part of the kitchen, they covered the window with (ugly) cabinets. Get ready for another spiffy drawing. 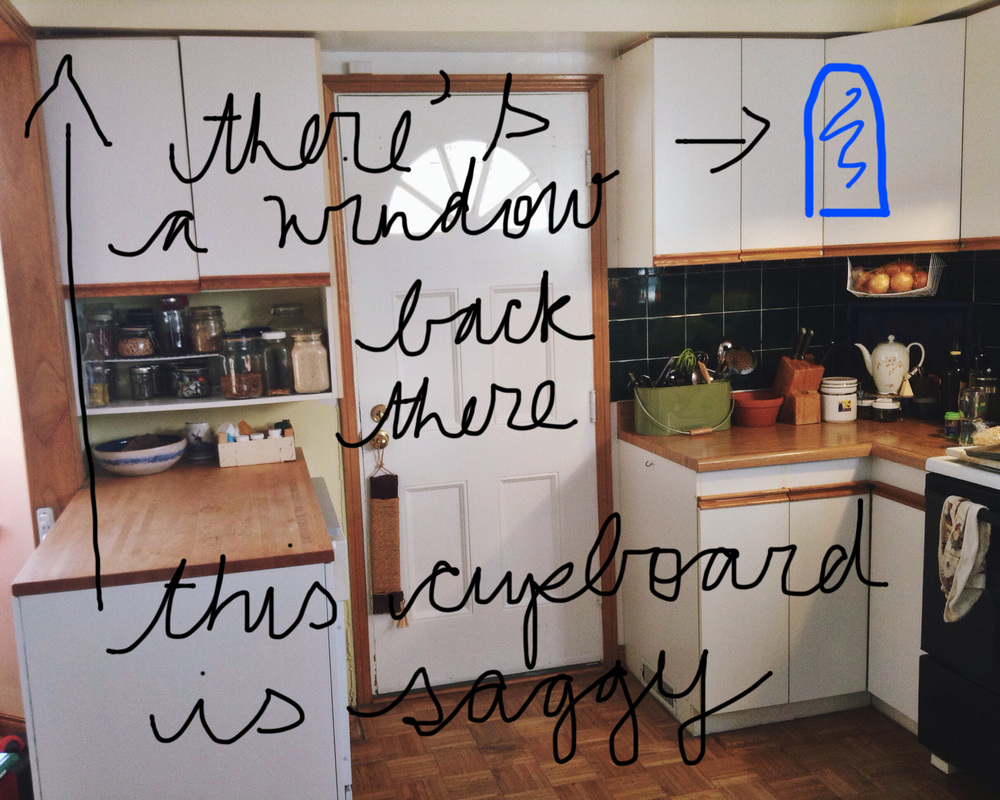 And as you can see, the other issue on this cupboard-laden wall is that one of the cabinets is coming out of the bulk head, so that needs to go. I will take down all the cabinets on this front wall and replace them with open shelving. The window will be free - hooray! - and open shelves and storage will make the room feel bigger and brighter. The other thing I will do to brighten up the kitchen is to paint over that awful forest green backsplash, which wraps all the way around the kitchen and even covers the entire wall behind our fridge. It's the black hole of backsplashes: it obliterates all light. (I'm not sure if that's how black holes work, but that's how my backsplash works.) 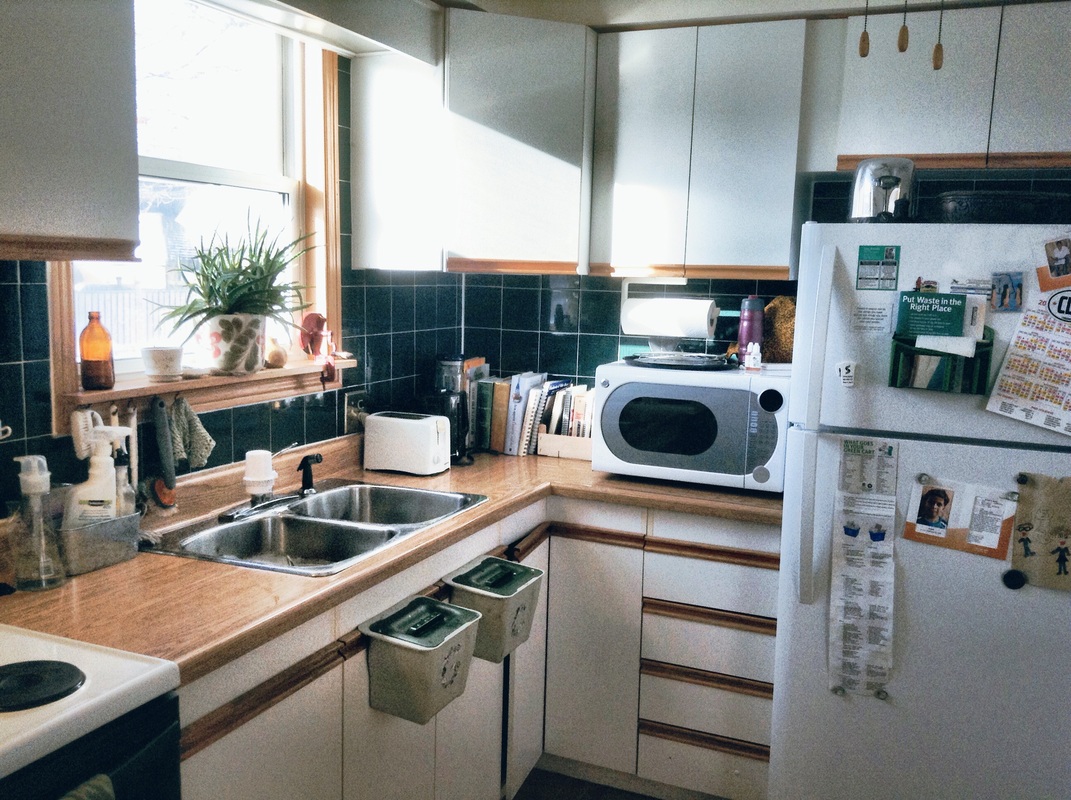 Ewww. So much green. Improve the use of space Believe it or not, taking down some cabinets will actually make a better use of the space in my kitchen, I think. There are two reasons I think so:
De-uglify Painting the forest green backsplash will be a giant leap forward in de-uglifying my kitchen. What I also hope to do is replace or reface the unattractive 1980's laminate-with-weird-oak-trimmy-handles cupboard doors. The doors are made from particle board, so if I don't keep them, they'll have to be thrown away, and I don't necessarily like that idea. So I've been combing through Pinterest for clever refacing ideas. I might do a combination of refacing and replacing . . . whatever is free! Where to Start? Even though I'm not ripping out and replacing the whole kitchen, this update is still a big undertaking. And because I'm not spending any money, the progress will be unpredictable because I don't know what kinds of materials I'll have to work with and when I'll get them.
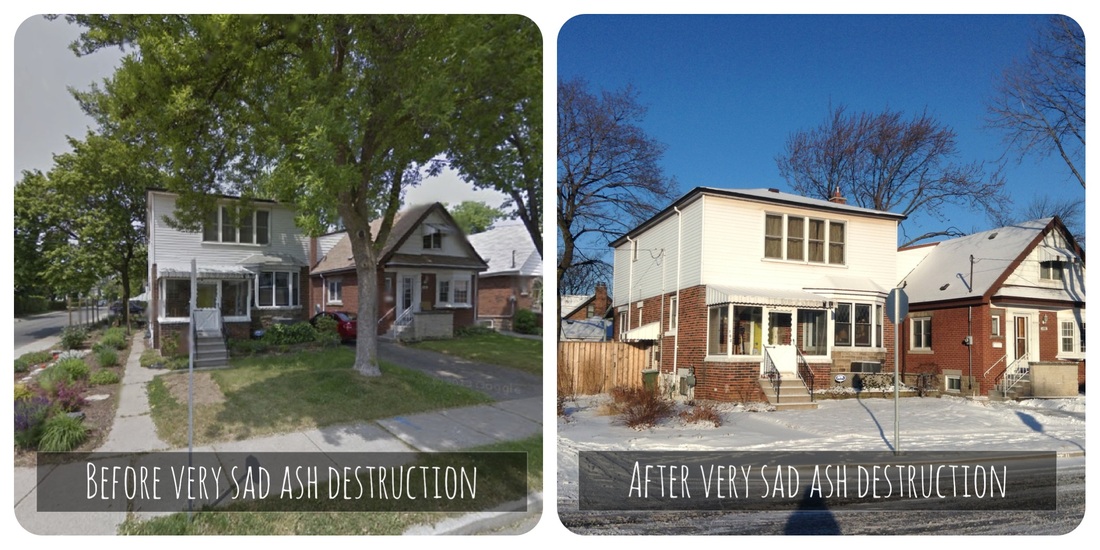
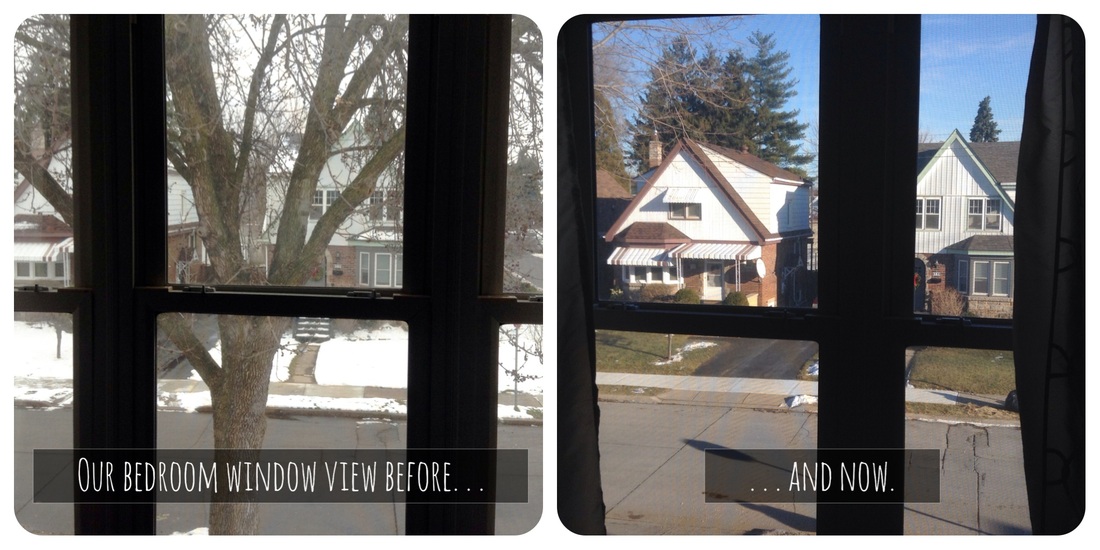
So I'm going to pick away at it, bit by bit. I'll start by taking down the cabinets and seeing what repairs to the walls and window might be required. Meanwhile, I've started looking for free building and decorating materials. I'm keeping my eye on Kijiji's Free section, driving around on garbage days, and keeping my eye out for accessible dumpsters at renovation sites. I'm like a garbage ninja. I have no idea what my "new" kitchen will look like. I just know it will be better than it is now. Stay tuned . . . As 2014 came to a close, so did the life of the ash tree that has shaded the front of our house since we moved here nearly eight years ago. We got a letter from the City of Hamilton in November letting us know that the tree had to come down. The emerald ash borer, a little beetle native to eastern Asia, has been destroying millions of ash trees across North America and poses a huge threat to ash forests in Hamilton. The City has been addressing the threat by monitoring Hamilton's ash trees (approximately 23,000), and destroying trees that show signs of damage from the ash borer. In addition, 800 "high value" ash trees are being treated with pesticide injections. It's the ash borer larvae that cause the problem: they chomp through the vital layer beneath the tree's bark. Within two years of initial signs of damage to the ash tree, it will be completely dead. If you drive around the neighbourhoods of east Hamilton, you'll notice that several trees have a white stripe painted on their trunks. These are all ash trees marked for destruction. It's so sad, but it's a measure that will hopefully prevent more ash trees from reaching the same fate.  It was a sunny afternoon just before Christmas when we heard the telltale sounds of the chainsaw coming from the front yard. We watched as, branch by branch, our beloved tree came down. After over 40 years of growing, it took less than an hour for it to be diminished to a naked trunk. I'm being a touch melodramatic, I know. But I'm sad about it.  In less than an hour, our ash tree goes from majesty to mulch. One of the reasons we bought our house - and knew it would feel like home - was because of the trees on the property (the backyard has a maple, an apple, and a cherry tree). This ash tree in the front yard was many things to us:
  The morning after the tree was taken down, I went out my front door to put out the recycling, and I saw a squirrel quite literally walking back and forth slowly in the front lawn, looking befuddled. I kid you not. I'm not sure I've ever seen a squirrel move at walking speed. I can imagine what he/she was thinking: "Huh? What the? There was a tree here yesterday." Hopefully that squirrel didn't have a nest in our tree . . . 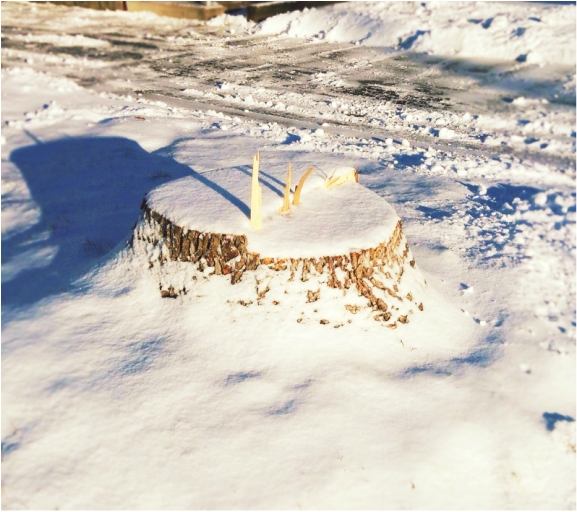 Replanting
 The trunk was so thick that the chainsaw couldn't saw all the way through it. The trunk had to be cut in half lengthwise by the stump grinder (second photo) so the chainsaw could get through the rest of the trunk. After the trunk was cut level to the ground, the stump grinder gnawed through the trunk beneath the ground. Pretty bad-ass. I'm sad about the loss of our tree. The experience of its loss has made me appreciate and think about the vast impact of each tree and the delicate balance of nature. It seems inconceivable that a tiny worm can bring down a mighty tree and outsmart the intelligence and outplay the resources of the humans who try to save the tree.
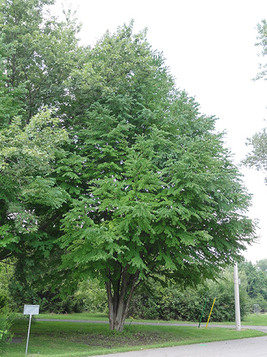
I've also been made more conscious of the life cycle of trees. Our neighbourhood was established in the first half of the twentieth century, so most of the trees that surround us are mature. In the last five years, several of these beautiful old trees have had to come down for various reasons. New trees have been planted, and in another 40 years, these meagre plants will be majestic givers of shade, accommodation, oxygen, and beauty. And I'm looking forward to seeing the katsura grow through its life cycle in front of my home.
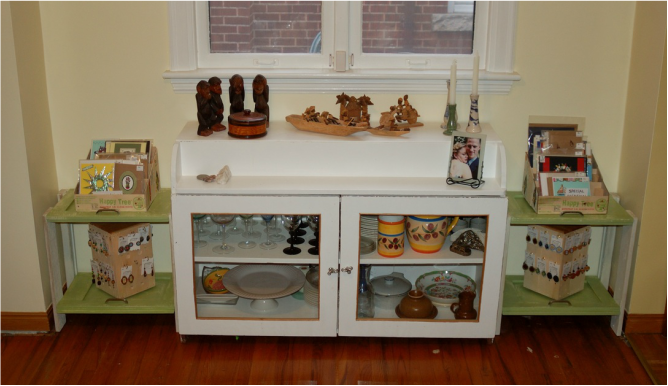
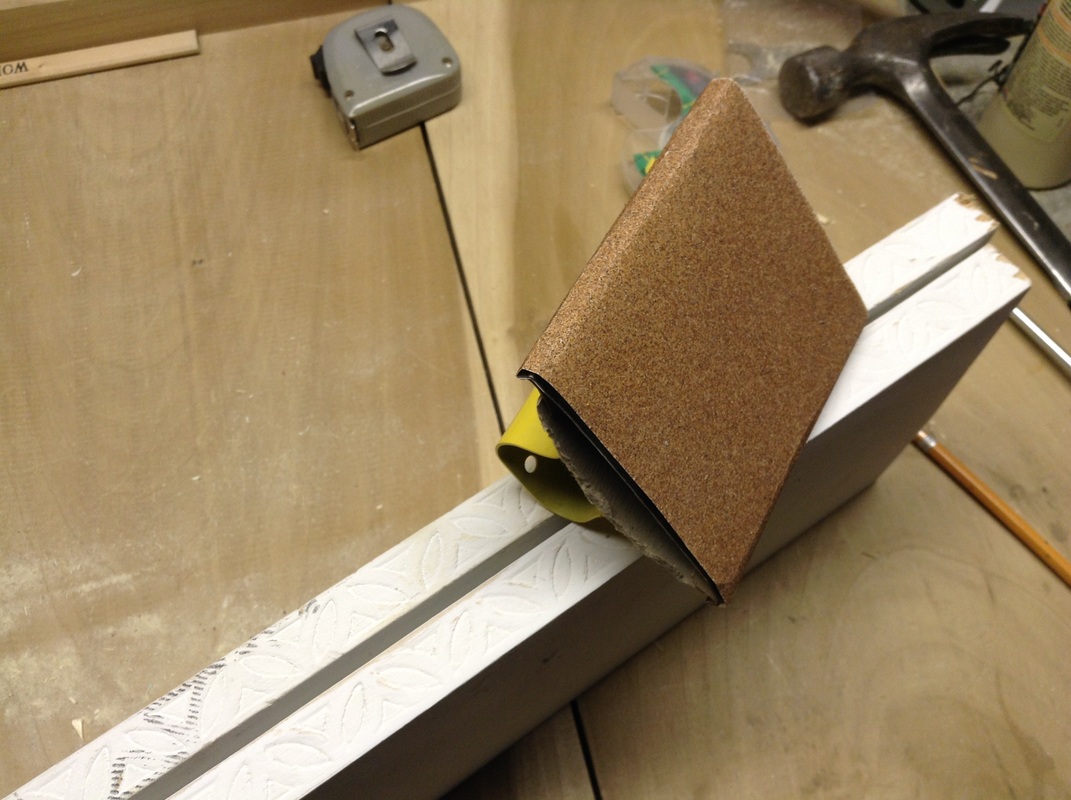
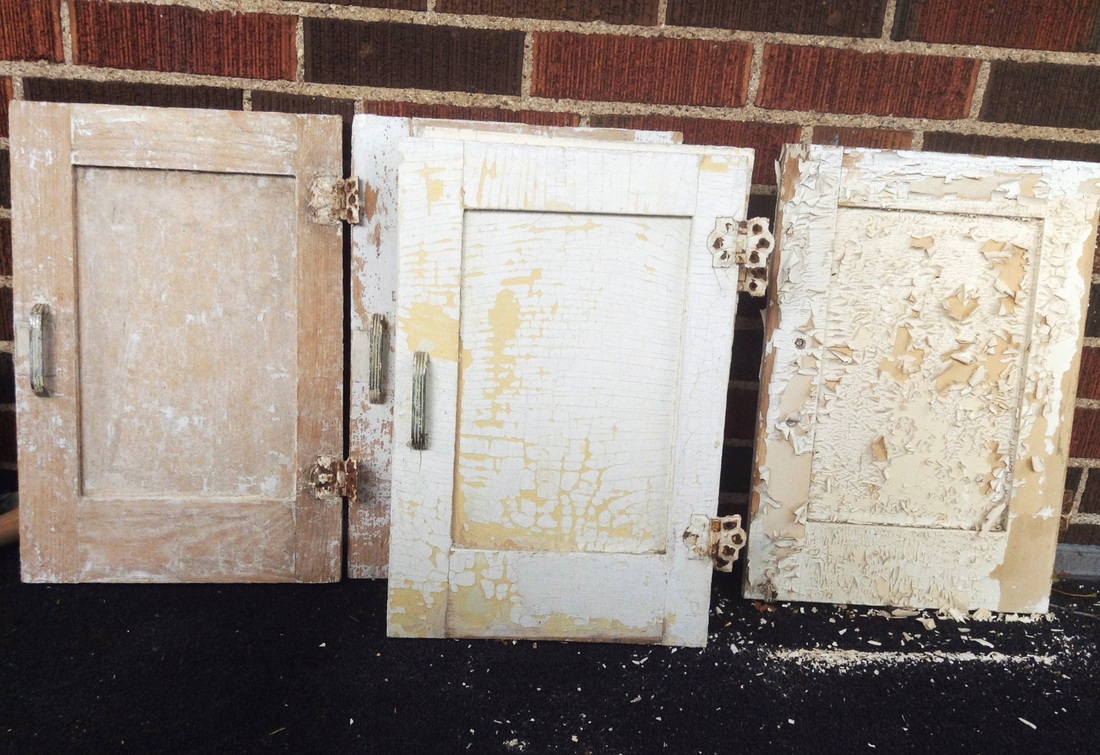
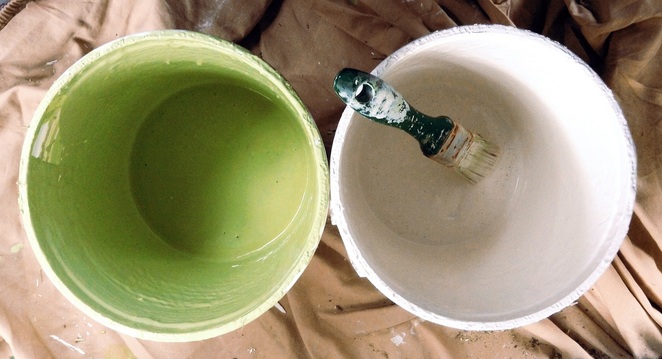
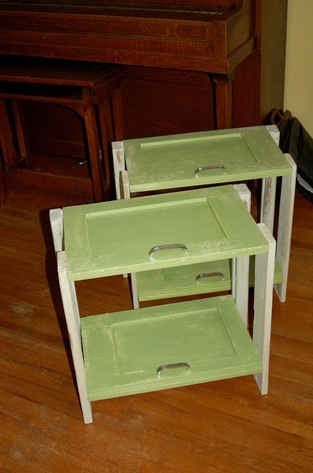
Fast forward a few seasons to this fall. I've been itching to fit my dining room with some storage to house my inventory so that it's easily accessible when people stop by the house to see my work. My dining room is smallish, a boxy extension of the living room so typical of 1940s houses, so storage options can be tricky. I had two small spaces where I could see putting some storage, so I started browsing online to see what Ikea, Canadian Tire, and all the others had to offer. I was underwhelmed at the options and defeated by the prices. But then - click! - the proverbial light bulb came on, and I thought, "I'll make something." And then - cachunk! - a giant floodlight came on, and I thought, "I'll make some tables out of those cupboard doors." I knew there was a reason I got them! Chalk Paint to the Rescue As you can see above, the cupboards were pretty beat up from sitting around for so long. I didn't feel like putting much more effort into refinishing them and I actually liked the distressed look they had, so I wanted to paint them with something that would adhere well, but still allow me to bring out some of the cupboards' distressed character. After some research, it looked like chalk paint would be my best bet, and because I'm cheap, I decided to make my own.
This recipe worked beautifully. The paint covered really well (with no primer!!!). I did a couple coats of soft white, followed by a couple coats of soft green, and then went over everything with some wet sandpaper to bring out the distressed texture of the weathered cupboard doors. Spiffy! 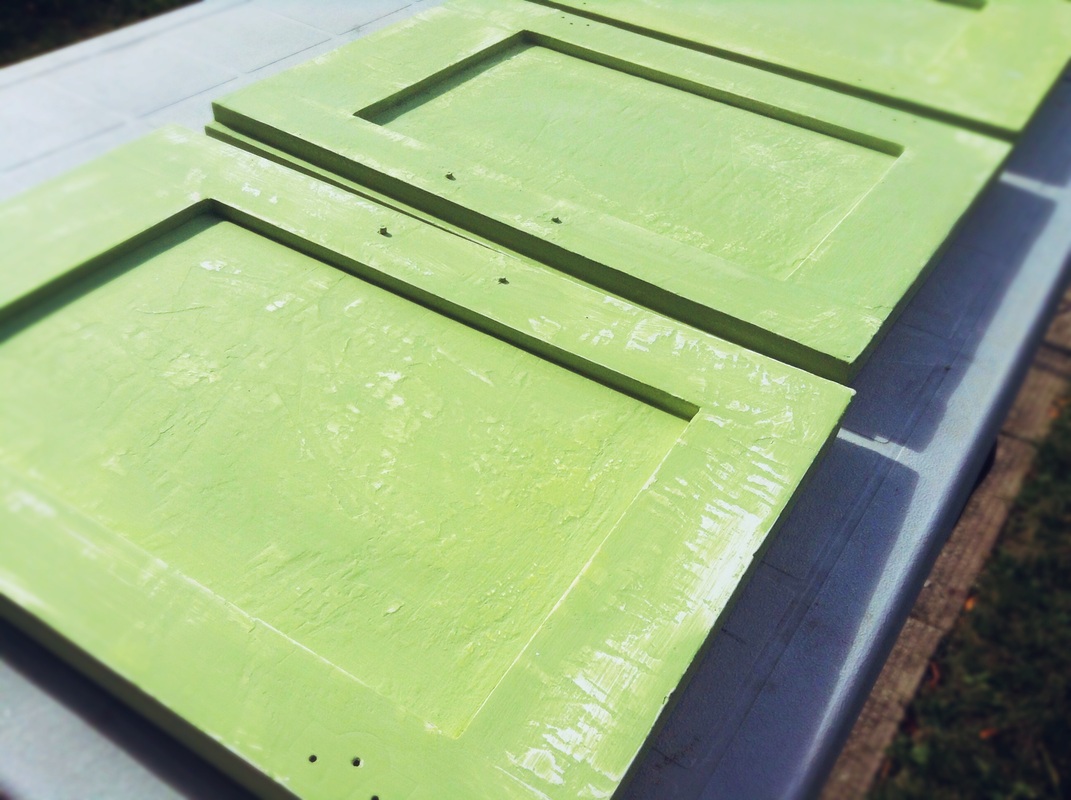 Great Legs: Pallet Wood For the table legs, I used planks from some old wood pallets I had salvaged from a few different places. I coated the wood with some white chalk paint, and once again distressed the finish with some wet sandpaper. The distressed boards were a great match for the weathered cupboard doors. 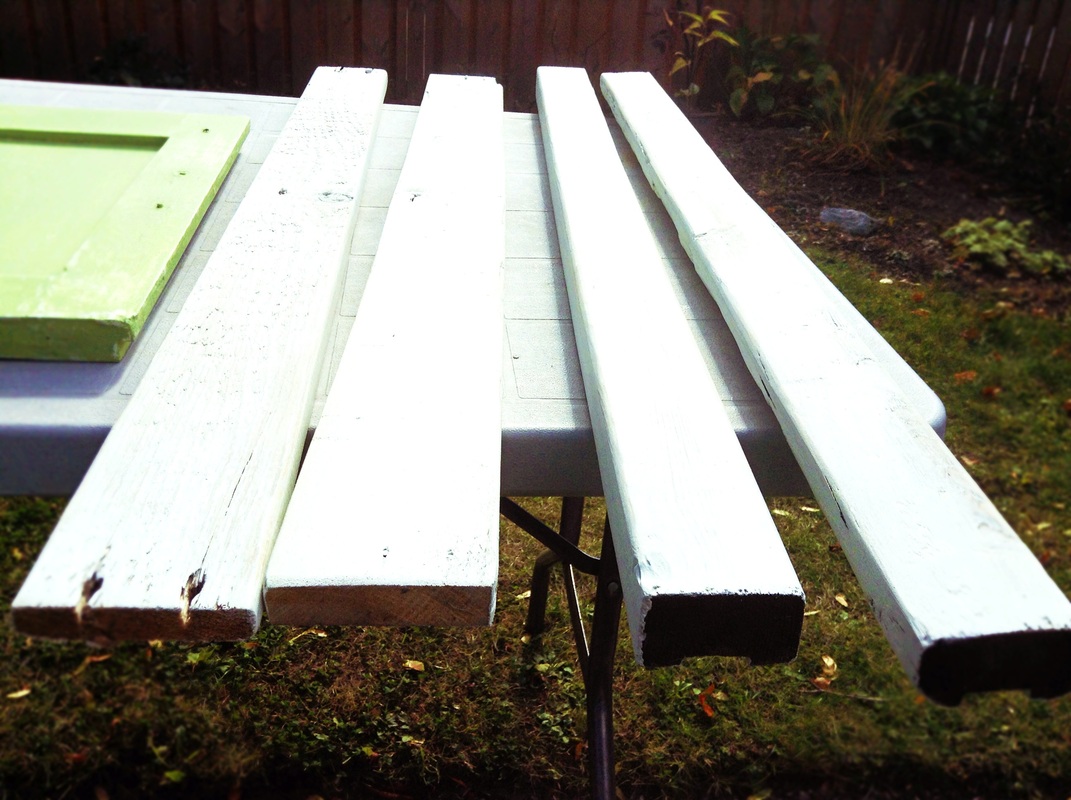
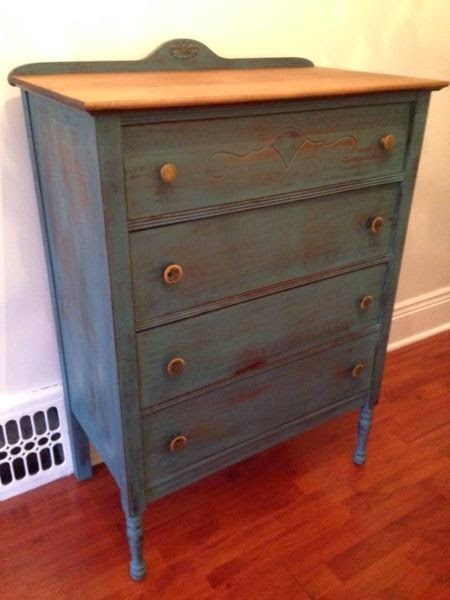
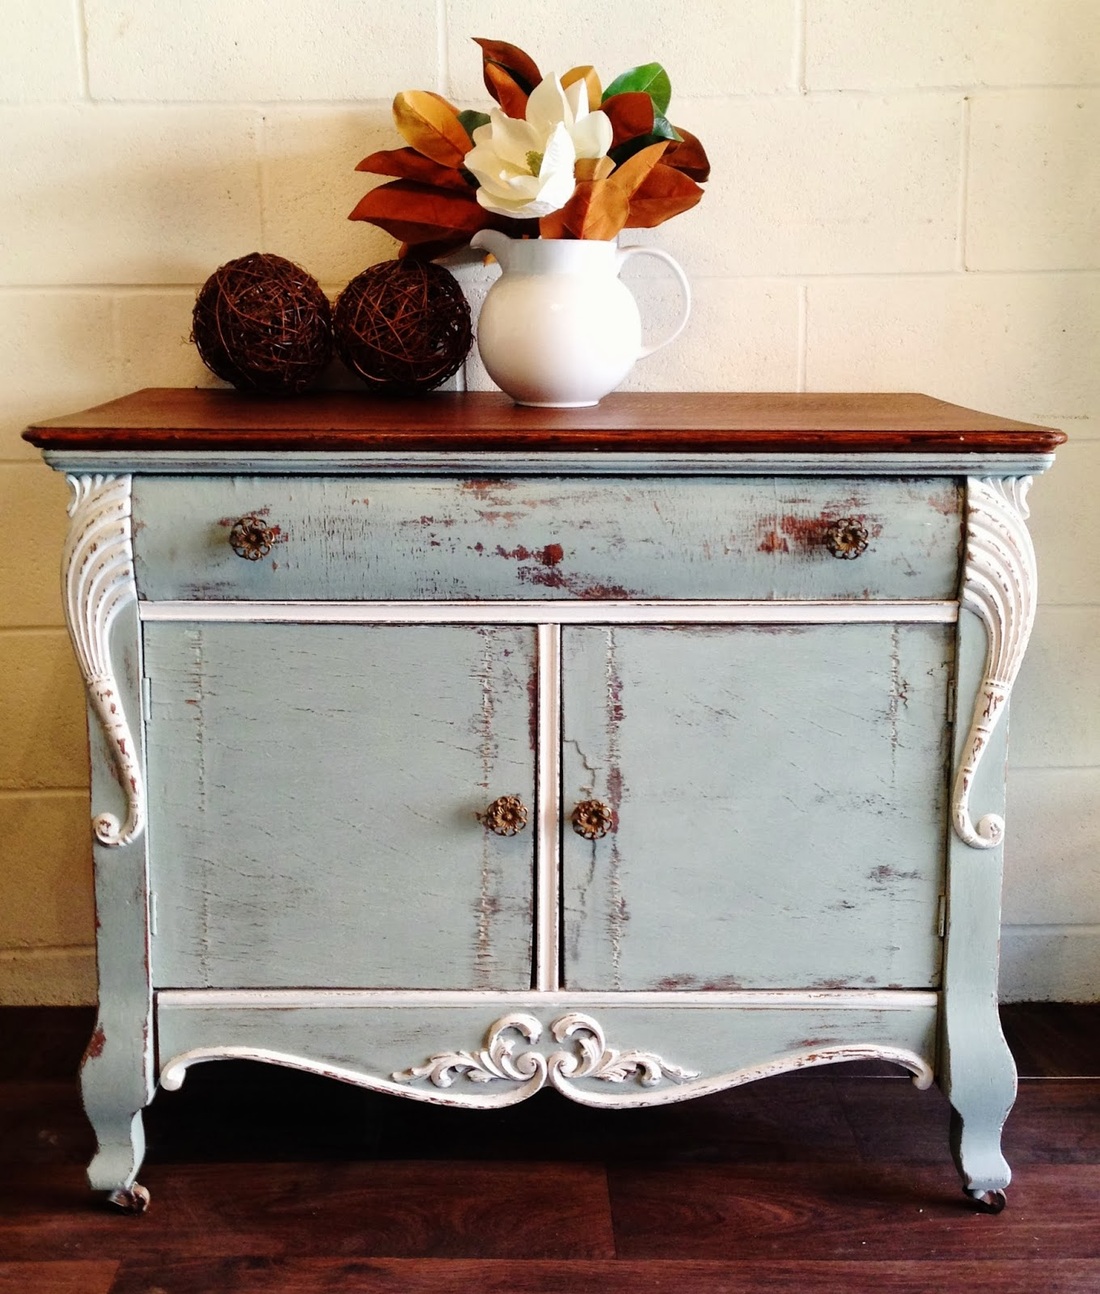
 My story about these quirky tables would be incomplete if I didn't mention someone who inspires me with her imagination and incredible talent with a can of paint. My friend Jen Vanderherberg takes discarded and neglected pieces of furniture and lovingly rejuvenates them into gorgeous, artful pieces. Her husband is an expert salvager, and together they find beautiful articles of furniture whose beauty has been worn down or stripped away. Jen uses an array of techniques to restore and/or refinish them, and then works her magic with chalk paint or milk paint. Set aside a couple hours, and spend some time perusing her blog to see all the gorgeous work she has done. To give you a taste, here's a wee sample of my favourites:
I got to know Brian's music a few years ago, when I produced a brief video spot about him with my Dofasco colleague, Sean. Dofasco lent us out to the Hamilton Music Awards to produce some short videos about different facets of Hamilton's music scene, and it was no surprise that Awards founder Jean Paul Gauthier wanted a spot on Brian Griffith. Sean and I showed up at Brian's house, set up the camera in his dining room, and proceeded to record over an hour of conversation.
Besides his immediate friendliness, what first struck me about Brian was his uninhibited and infectious excitement about music. He was passionate about Hamilton's music scene. He was giddy about the new musical ideas he was working on. He believed music should be experienced anywhere with anyone: on the big stage, at a Hess Village club, around the kitchen table, or on the front porch. In my opinion, Brian had the talent and the resumé - playing with the likes of Daniel Lanois, Willy Nelson, and Emmy Lou Harris - to have a giant rock and roll ego. Instead, he exuded gratitude and even awe that he was able to participate in and contribute to music culture. One of my favourite moments of that visit to his house was when he showed Sean and I the blanket Willy Nelson gave him, draped over his couch like a granny afghan. He got a real kick out of it. After the interview, I spent a couple nights shooting video of Brian performing at some clubs in Hess Village. He played solo, and that weekend he also teamed up with Harrison Kennedy and Sharon Musgrave. As I zoomed in on his fingers dancing across the frets and strings, I could appreciate just how masterful he was. His face was alight with all the expressions of a truly passionate musician: smiling, grimacing, squinting, eyes closed with raised eyebrows (serenity, maybe?). I remember this great shot I got of him turning his head from side to side in time with the music, his dreadlocks flying: I shot it on a low shutter speed, so his dreadlocks were these blue-lit rhythmic blurs flying across the screen. And as I would pan across the stage, it was abundantly clear that everyone was having a great time up there with him. The last time I saw and heard Brian Griffith play was this past August at the annual Greenbelt Harvest Picnic, a music festival organized by Daniel Lanois and Jean Paul Gauthier that celebrates the agriculture and arts culture of the Hamilton area. Brian was on small stage in the middle of the crowd, jamming with Daniel Lanois, playing with the freestyle agility and artistry that so typified his musical presence. It's a great image: Brian jamming with a few guys, surrounded by appreciative listeners, with the sounds echoing off Christie Lake through the trees. As I said before, it's hard to express the immensity of this loss. Another Hamilton musician Tom Wilson said it well, I think: "Brian was really what Hamilton music was all about. He was about neighbourhood. He loved playing on his block. Nobody else could give what he gave us. He inspired generations." I guess we can just smile with gratitude that we were able to enjoy the gifts he so abundantly shared with everyone while he was here. |
Jane Hogeterp Koopman

Subscribe to Jane's Blog by RSS or email:
Categories
All
Archives
January 2018
Stuff I love:
|


 RSS Feed
Proudly powered by Weebly