
|
On Etsy.com, where I have my online shop, I am part of a team of other wonderful creatives who share my passion for upcycling. Each month, Team Upcyclers hosts a challenge: one of the team members chooses an item to upcycle - like wine corks, old sweaters or old neck ties - and the other team members respond by submitting new and innovative ways of reusing and repurposing the challenge item. You can see some of the past challenges by visiting the Team Upcyclers Blog. This month the upcycle challenge was to find a use for old and broken jewelry. This was a timely challenge for me because I recently acquired a few shoe boxes full of old and broken jewelry from my Mom and a couple aunts. I have reused a lot of the jewelry from these generous ladies to make other jewelry, but there are a few odds and ends that I can't use to make jewelry. This month's Team Upcyclers challenge provided the perfect opportunity to come up with some ideas. 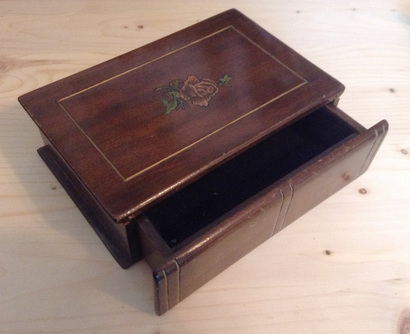 One night, I woke up in the middle of the night with an idea of what to do. Why not spruce up an old jewelry box by using old jewelry? It was hard to get back to sleep as I imagined the possibilities. This week, I headed off to a local reuse centre (the Burlington Reuse Centre - bar none, my favourite place to shop), in search of a jewelry box in need of some love. I found this adorable little jewelry box with a drawer. It was pretty dirty and had a few chinks taken out of the finish, so I figured it was a perfect candidate for some upcycled glory. 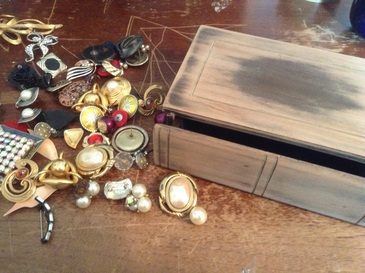 After taking it home and cleaning it, the first thing I did was sand down most of the dark finish to smooth out some of the chinks and scratches. Then, I picked through my stash of 80s earrings, broken brooches and partner-less earrings to see what ensemble would work. The moment I saw this box at the reuse centre, I knew I could use some old earrings as drawer pulls . . . a moment of upcycling destiny, I'd say. 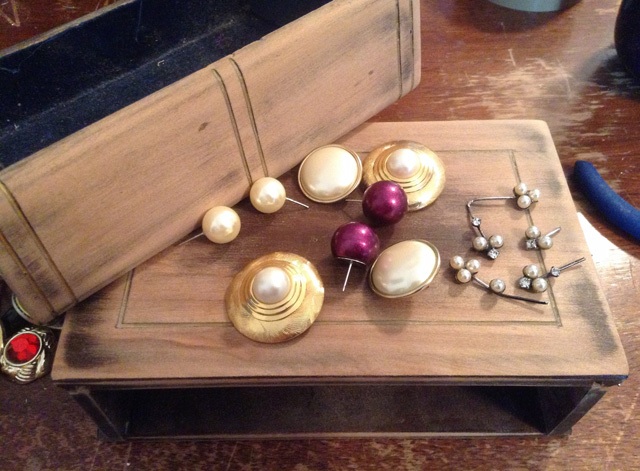 I decided to go with a pearl theme. I picked out some post back earrings and a brooch that had fallen apart (on the right in the photo). I also used some earring posts that had lost their dangled attachments.  Post back earrings are perfect for this sort of project because the posts can be used as pins for attaching to surfaces. I cut down each post at an angle to create a sharp pinpoint. Then, I arranged all the pieces the way I wanted them. Based on my layout, I drilled tiny holes into the wood, into which I could insert the earrings. Before pinning the earrings into the wood, I added some glue (my beloved Weldbond), just to make sure everything stayed secure. I attached the brooch pieces with glue, tucking them underneath and between the earring pieces. And here's the result! I'm pretty happy with how this little jewelry box turned out, and I think it will make a great addition to the top of my dresser. Thanks to the Team Upcyclers challenge, I got motivated to rethink, and found a new purpose for some long-neglected implements of fashion. 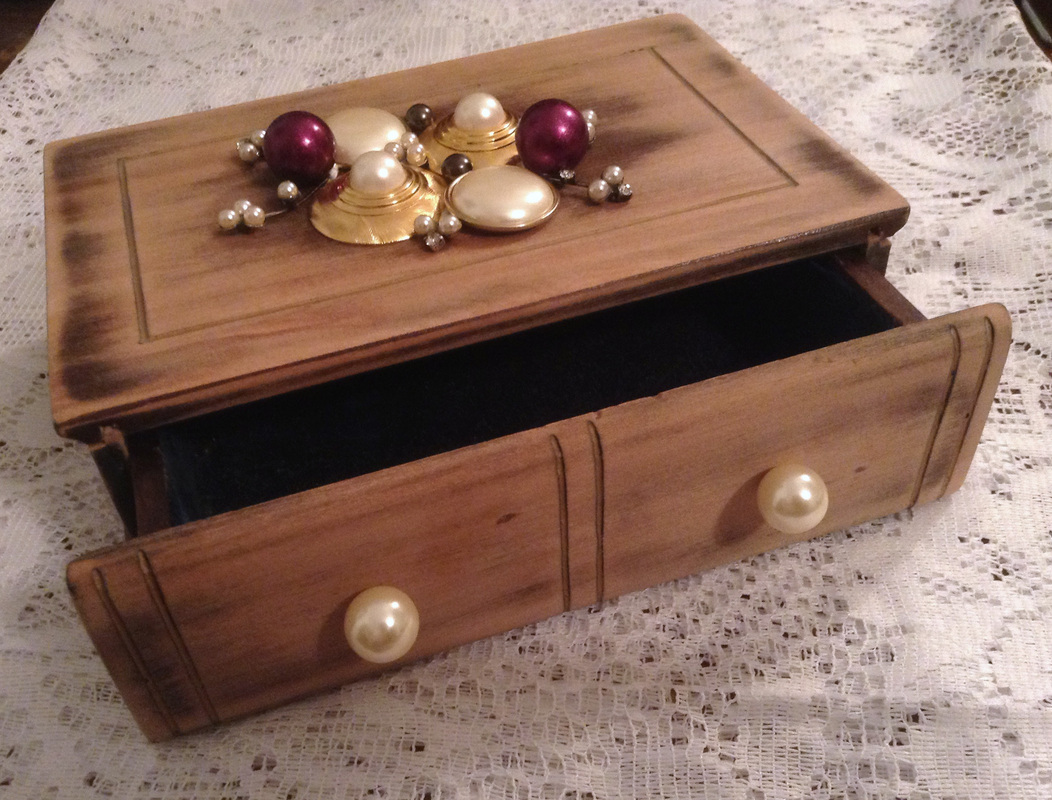  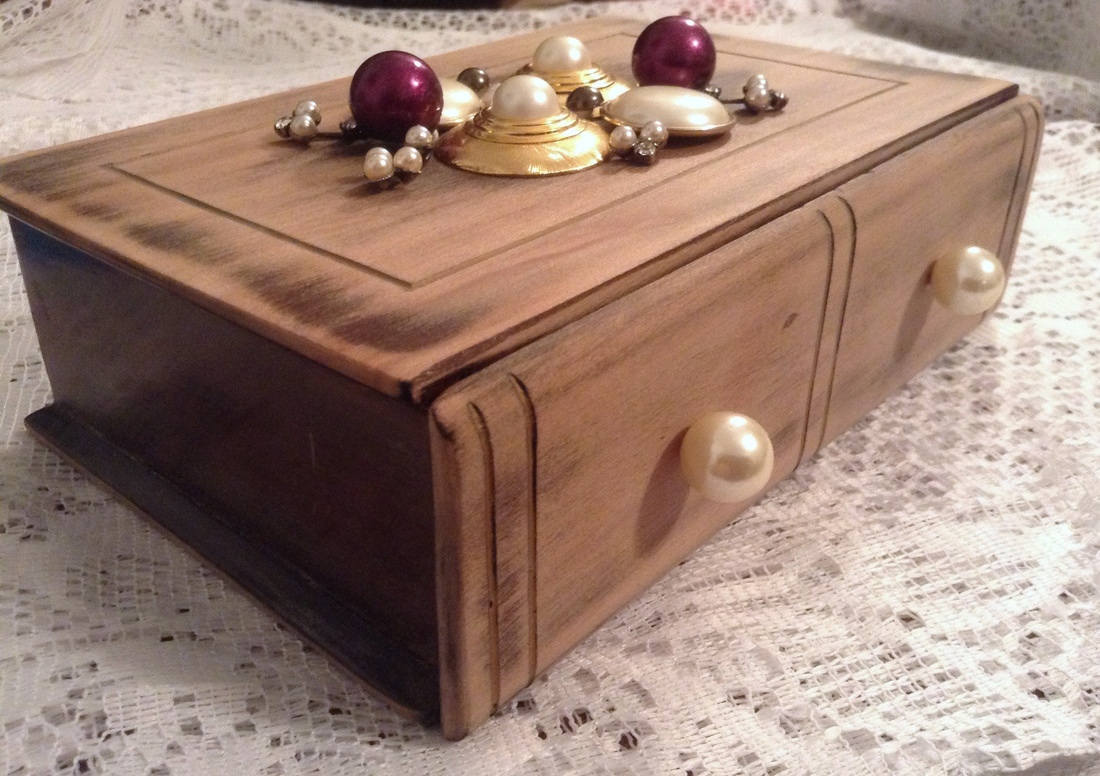
1 Comment
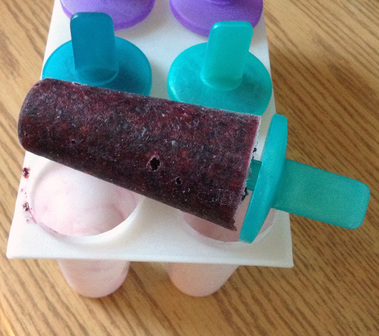 blueberry vodka popsicle . . . mmmmm blueberry vodka popsicle . . . mmmmm A recent garage sale excursion resulted in a nostalgia trip for me when I came across some popsicle molds in mint condition. When I was a kid, homemade popsicles were a summertime staple. For my mom and all my friends' moms, popsicle molds provided a cost effective solution for luring their kids away from the neighbourhood Dickie Dee ice cream bike: just fill up the molds with whatever juice was in the house, and your kids could have a frozen treat on a summer afternoon. I was pretty stoked to find these popsicle molds, and was inspired - on the spot - to revive the summertime staple of my youth. I've been trying to make more of my own snacks lately, in an effort to eat healthier and have more control of what goes into my body. And well, it also saves money, so that's nice too. So the prospect of frozen snacks had me a little giddy. 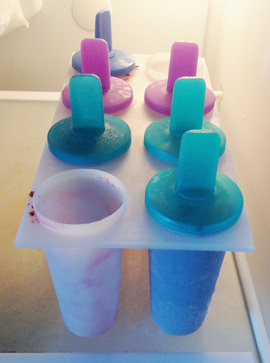 frozen blueberry vodka deliciousness frozen blueberry vodka deliciousness As soon as I got home, I started scouring Pinterest and was amazed to find hundreds of wonderful ideas and recipes for homemade popsicles. And they're miles beyond the OJ and Kool-Aid popsicles of yesteryear. There are all sorts of concoctions with fresh fruit, yogourt, pudding, ice cream, and alcohol.
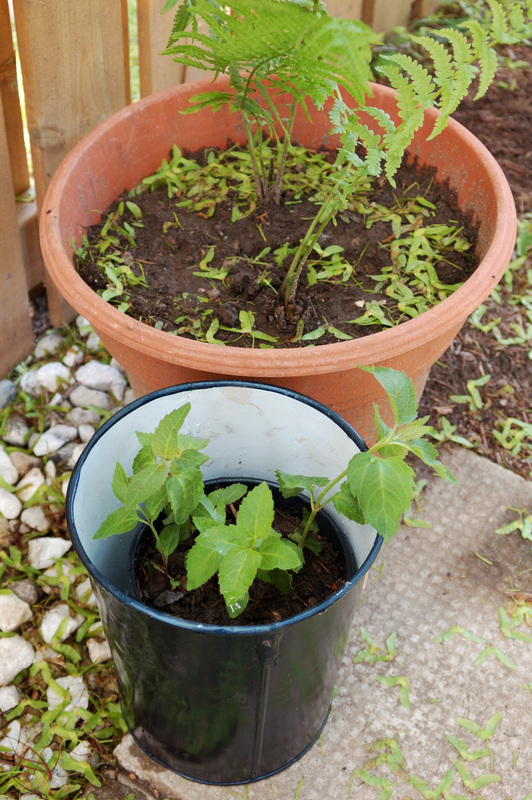
I thought I'd start with alcohol. And not necessarily because I'm a lush. Of course, the concept of a frozen cocktail is extremely appealing, but the best thing about putting alcohol in a popsicle is that alcohol improves the consistency of the popsicle. Alcohol has a lower freezing point than water, so a popsicle made with alcohol is much easier to eat because it's not a solid block of ice. Of course, it also tastes amazing. My first "poptail" attempt was these Blueberry Vodka Popsicles because they seemed super easy, with only four ingredients: blueberries, simple syrup (sugar and water), lemon juice and vodka. They were very easy to make, and even easier to eat . . . yum! This recipe will fill two eight-popsicle molds like mine, as pictured. The recipe calls for fresh blueberries, but I used frozen blueberries, and that worked well. As you can see from the photo, my husband and I have already dug in, and I'm sure the popsicle mold will be ready for refill in no time. If you want to look for popsicle recipes with alcohol, you can search a number of terms: "poptails", "spiked popsicles" or "alcohol popsicles" will bring lots of results: everything from mojitos to margaritas to mudslides can be found in popsicle form! 6/12/2013 More Garden Container Ideas to Save You Money and Make a Uniquely Beautiful Patio GardenRead NowIn my last post, I introduced some ideas for turning household items into garden containers. In a similar vein, I'll show you some ideas in this post for repurposing second hand finds as plant pots. For a reminder about what you should look for in a garden container, read my previous post about repurposed garden containers. Where to Find Garden Containers: The Antique Store Antique markets and shops provide lots of interesting options for garden containers, often at a reasonable price. When you search antique stores, give yourself lots of time so your imagination has ample time to wander (and so you can hunt for a good bargain). 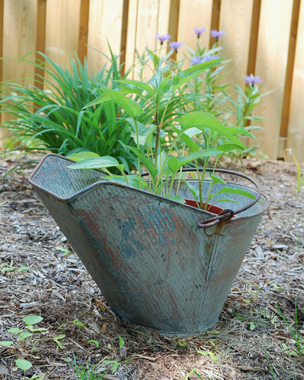 This is an old coal bucket in which I've set a plastic plant pot full of purple coneflower (echinacea). I didn't actually find this at an antique store: it was sitting in a corner of our garage when we moved into our house . . . another treasure left behind by the previous owners. But I have seen many of these at antique stores, usually at a decent price. This container has ample room for a good sized plant. And I love the visual interest that the shape of the coal bucket adds to the garden. Here's an antique store find that I got for $8: an old sap bucket, once hung on a maple tree to collect sap for making maple syrup. It's nice and deep, and of course more than able to stand up to the elements. Because it's such a deep container, I have used it to house a tall perennial, false sunflower, which gets lovely yellow flowers later in the summer. The yellow flowers will look gorgeous with this blue container, and I love it that I have something so iconically Canadian in my garden.
Where to Find Garden Containers: Second Hand Stores and Garage Sales You can often find used flower pots, window boxes and garden containers at second hand stores and garage sales. But if selection is scarce for traditional garden containers, look for something out of the ordinary or eclectic: buckets, colanders, stock pots, camping dishes, crockery . . . heck, even an old wagon would be a great thing for vessel for potted plants. 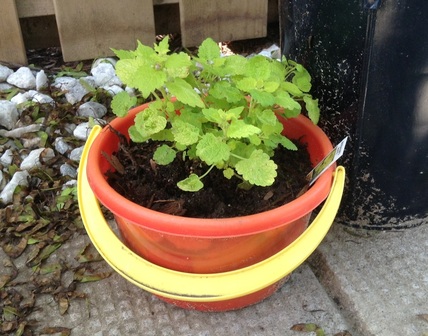 I found this cute sandbox/beach bucket at a second hand store and knew right away it would be a perfect plant pot. I poked some holes in the bottom of the pail and planted some golden spotted lamium in it. I'm pretty stoked about how amazing this lime green lamium looks in the orange and yellow pail. The vibrant colours some playfulness to the patio. These ideas just scratch the surface of what you can use to pot up your plants. Let yourself explore, and I know you'll enjoy the surprising and eclectic results.
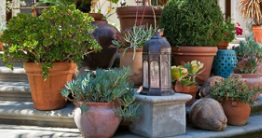 photo, landscapingnetwork.com photo, landscapingnetwork.com A few weeks ago, I wrote about my plans to grow some perennials in pots in the areas of my yard where it's difficult to plant anything. I haven't spent a cent yet on the plants for my potted perennial plans: so far I've been able to use divided plants and seedlings from my own garden and those of my friends. The trickier - and potentially more costly - part of this plan is finding the containers themselves. Containers and planters from garden centres and home stores are beautiful, but they can be pricy (and heavy!). So, I've had to come up with some free and low cost solutions to work within my budget. And really, I'm happy to do it. My perennial pots might not be super cohesive or colour coordinated, but they'll have lots of character. In my next two blog posts, I'll fill you in on some ideas I'm trying that might also work in your garden. What to Look for in a Garden Container There are three main qualities to consider when looking for a container for potting perennials:
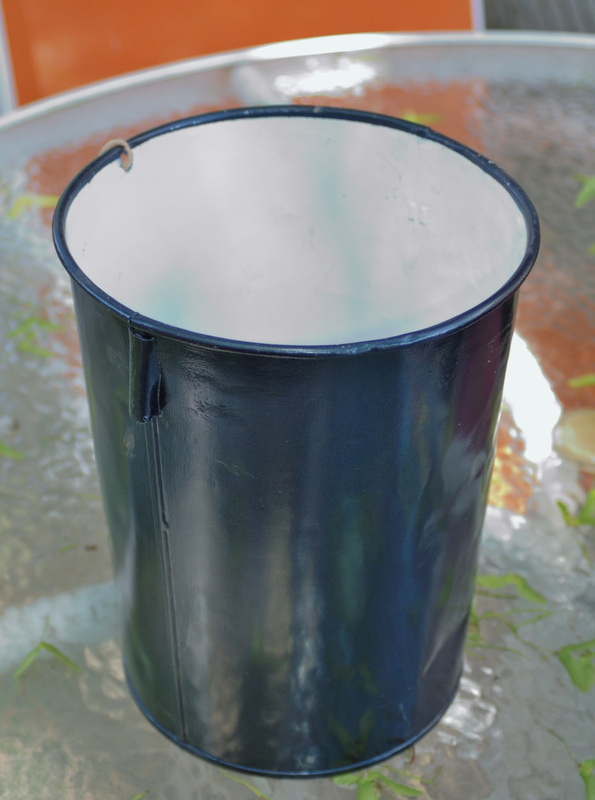
Where to Find Garden Containers: Around the House and Garage Your kitchen, basement and garage are excellent sources for garden containers. You might have some old pots and pans in the back corners of your kitchen cupboards or some wicker baskets in the basement. In the garage, you might have an old watering can, an old bucket, or even and old wheelbarrow. Just use your imagination. 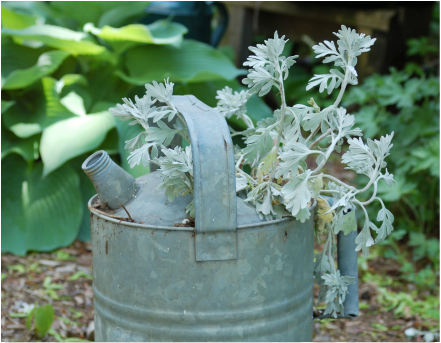 This old steel watering can was left in our garage by the previous owners of our home. And I very much appreciate that they did. I used the watering can for a couple years until it leaked more than it poured. It has a small opening, but it makes a lovely garden container for traily plants that can cascade over the sides of the container. And it's nice and deep for all those roots. This week, I divided some silver brocade artemisia (sweet wormwood) from my front garden and put some of it in this old watering can in my backyard garden. 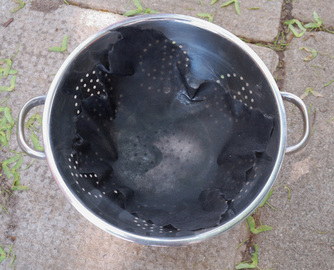 Here's another idea you might have come across on Pinterest or Flickr - as I did: a colander makes a perfect planter because it definitely has ample drainage. And it's cute too. This metal colander doesn't come from my own kitchen, but I got it at a garage sale down the street for a quarter! I lined it with a piece of landscaping fabric, just to prevent any soil from draining out. I transplanted some lamium (deadnettle), which is a beautiful ground cover plant, so I thought it would do well in this wide container. Et voila! I really love how it looks staggered with other planters on my patio. (Now if I could only stop our maple tree from dumping so many maple keys all over everything.) In my next post, I'll give you some ideas for second hand finds that you can turn into garden containers. 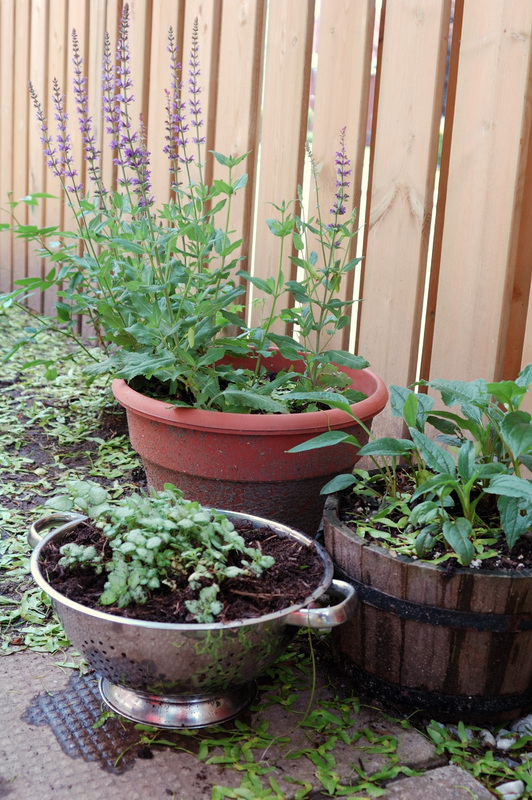
potted perennials: (l-r) lamium (deadnettle), blue sage, coneflower (echinacea)
|
Jane Hogeterp Koopman

Subscribe to Jane's Blog by RSS or email:
Categories
All
Archives
January 2018
Stuff I love:
|
 RSS Feed
Proudly powered by Weebly